Get started

This guide describes how you can get started with Charmed Kubeflow (CKF), from deploying to accessing it. It is intended for system administrators and end users.

CKF provides a simple, out-of-the-box way to deploy Kubeflow. It sets default configurations, while still providing flexibility to configure it as you like.

This tutorial deploys the latest supported version of CKF. For using other versions, check Supported versions for compatibility with Kubernetes and Juju.

Requirements

  • Ubuntu 20.04 (Focal) or later.
  • A host machine with at least a 4-core CPU processor, 32GB RAM and 50GB of disk space available.

Install and configure dependencies

CKF relies on:

  • Kubernetes (K8s). This tutorial uses MicroK8s, an open-source zero-ops lightweight distribution of Kubernetes, to run a K8s cluster.
  • A software orchestration engine. This tutorial uses Juju to deploy and manage the Kubeflow components.

Install MicroK8s

This tutorial deploys the latest version of K8s supported in CKF. For using other versions, check Supported versions for compatibility with Juju. If you have already installed MicroK8s, you may skip some steps within this section.

MicroK8s can be installed using snap as follows:

sudo snap install microk8s --channel=1.29/stable --classic

After MicroK8s is installed, you need sufficient permissions to access it. Grant those as follows:

sudo usermod -a -G microk8s $USER

To refresh the permissions, restart your machine or run the following command:

newgrp microk8s

See Get started with MicroK8s for more details about installing MicroK8s.

Configure MicroK8s

For deploying CKF, additional features from the default ones that come with MicroK8s are needed. These can be installed as MicroK8s add-ons. Run the following command to enable them:

sudo microk8s enable dns hostpath-storage metallb:10.64.140.43-10.64.140.49 rbac

To confirm that all add-ons are successfully enabled, check the MicroK8s status as follows:

microk8s status

The add-ons configuration may take a few minutes to complete before they are listed as enabled.

Install Juju

This tutorial uses Juju 3.4. For using other versions, check Supported versions for compatibility with K8s. If you have already installed Juju, you may skip some steps within this section.

Juju can be installed using snap as follows:

sudo snap install juju --channel=3.4/stable

On some machines, there might be a missing folder required for Juju. To ensure this folder exists, create it as follows:

mkdir -p ~/.local/share

See Get started with Juju for more details about installing Juju.

Configure Juju

Enable MicroK8s for Juju as follows:

microk8s config | juju add-k8s my-k8s --client

Next, deploy a Juju controller to your MicroK8s cluster:

juju bootstrap my-k8s uk8sx

The controller may take a few minutes to deploy.

The Juju controller is used to deploy and control the Kubeflow components.

You now need to create a Kubeflow model for the Juju controller as follows:

juju add-model kubeflow

The model name must be kubeflow.

Deploy CKF

MicroK8s uses inotify to interact with the file system. Kubeflow requires increasing the inotify limits. To do so, run the following commands:

sudo sysctl fs.inotify.max_user_instances=1280
sudo sysctl fs.inotify.max_user_watches=655360

If you want these commands to persist across machine restarts, add the following lines to /etc/sysctl.conf:

fs.inotify.max_user_instances=1280
fs.inotify.max_user_watches=655360

To deploy CKF with Juju, run the following command:

juju deploy kubeflow --trust --channel=1.9/stable

The deployment may take a few minutes to complete.

Once the deployment is completed, you get a message like the following:

Deploy of bundle completed.

After the deployment, the bundle components need some time to initialise and establish communication with each other. This process may take up to 20 minutes.

Check the status of the components as follows:

juju status

Use the watch option to continuously track their status:

juju status --watch 5s

You should expect an output like this:

Model     Controller  Cloud/Region      Version  SLA          Timestamp
kubeflow  uk8sx       my-k8s/localhost  3.4.5    unsupported  16:12:02Z

App                      Version                  Status  Scale  Charm                    Channel          Rev  Address         Exposed  Message
admission-webhook                                 active      1  admission-webhook        1.9/stable       344  10.152.183.153  no       
argo-controller                                   active      1  argo-controller          3.4/stable       545  10.152.183.168  no       
dex-auth                                          active      1  dex-auth                 2.39/stable      548  10.152.183.184  no       
envoy                                             active      1  envoy                    2.2/stable       263  10.152.183.74   no

Unit                        Workload  Agent      Address     Ports          Message
admission-webhook/0*        active    idle       10.1.80.9                  
argo-controller/0*          active    idle       10.1.80.10                 
dex-auth/0*                 active    idle       10.1.80.11                 
envoy/0*                    active    idle       10.1.80.14

CKF is ready when all the applications and units are in active status. During the configuration process, some of the components may momentarily change to a blocked or error state. This is an expected behaviour that should resolve as the bundle configures itself.

Access your deployment

You can interact with CKF using a dashboard, accessed through a web browser.

Configure dashboard access

To enable authentication for the dashboard, set a username and password as follows:

juju config dex-auth static-username=admin
juju config dex-auth static-password=admin

Access the dashboard

To check the IP address associated with your deployment, run the following command:

microk8s kubectl -n kubeflow get svc istio-ingressgateway-workload -o jsonpath='{.status.loadBalancer.ingress[0].ip}'

You should see an output like this: 10.64.140.43, which is the default IP address used in the MicroK8s configuration. If the output shows a different IP, use that IP for the rest of this tutorial.

To access your deployment, open a browser and visit the dashboard IP. You should see the login page where you need to enter the credentials previously set up.

Enter the username in the “Email Address” field.

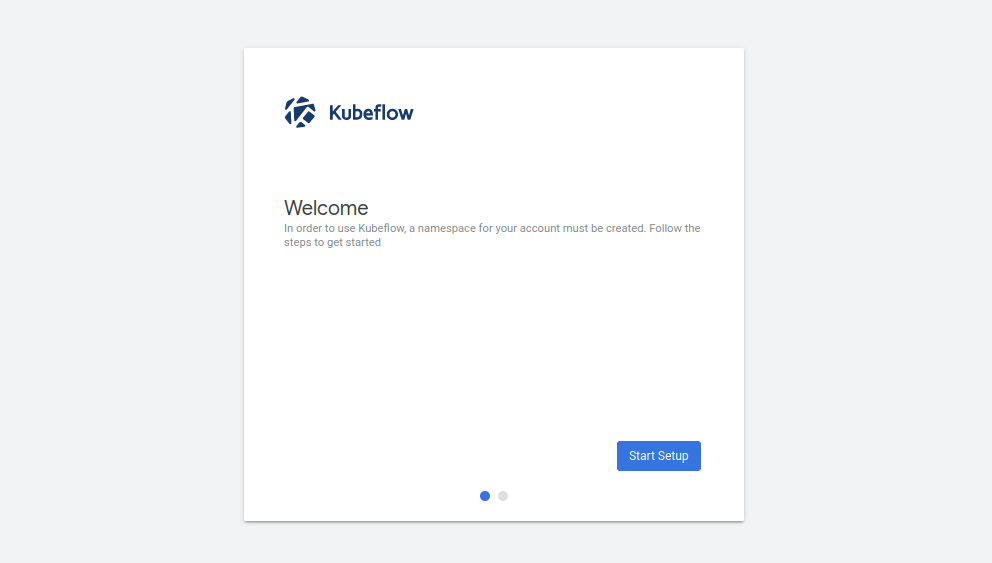
You should now see the welcome page:
welcome_page

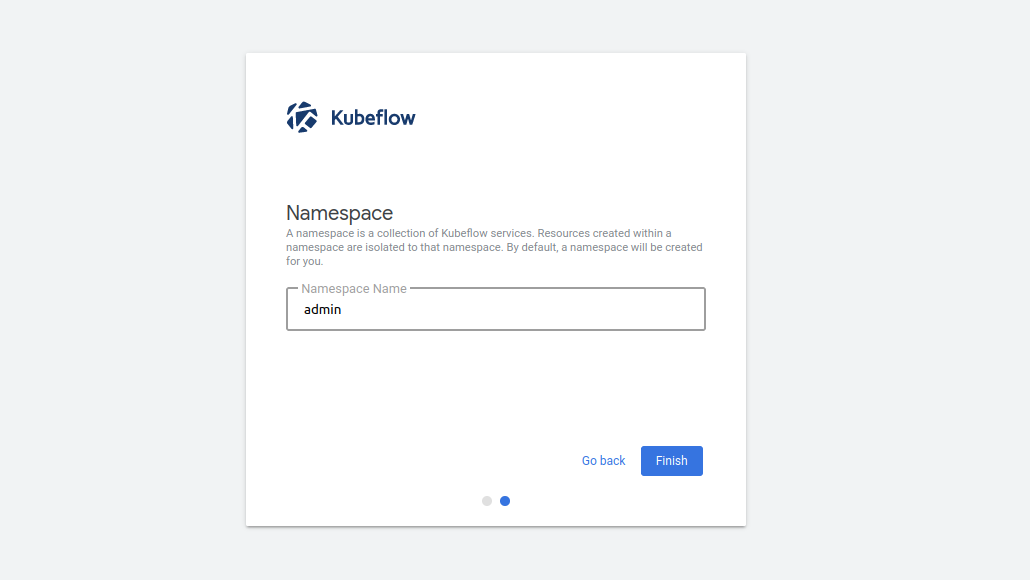
Get started by clicking on Start Setup. Next, create a namespace for keeping all files and settings within a single location:
namespace

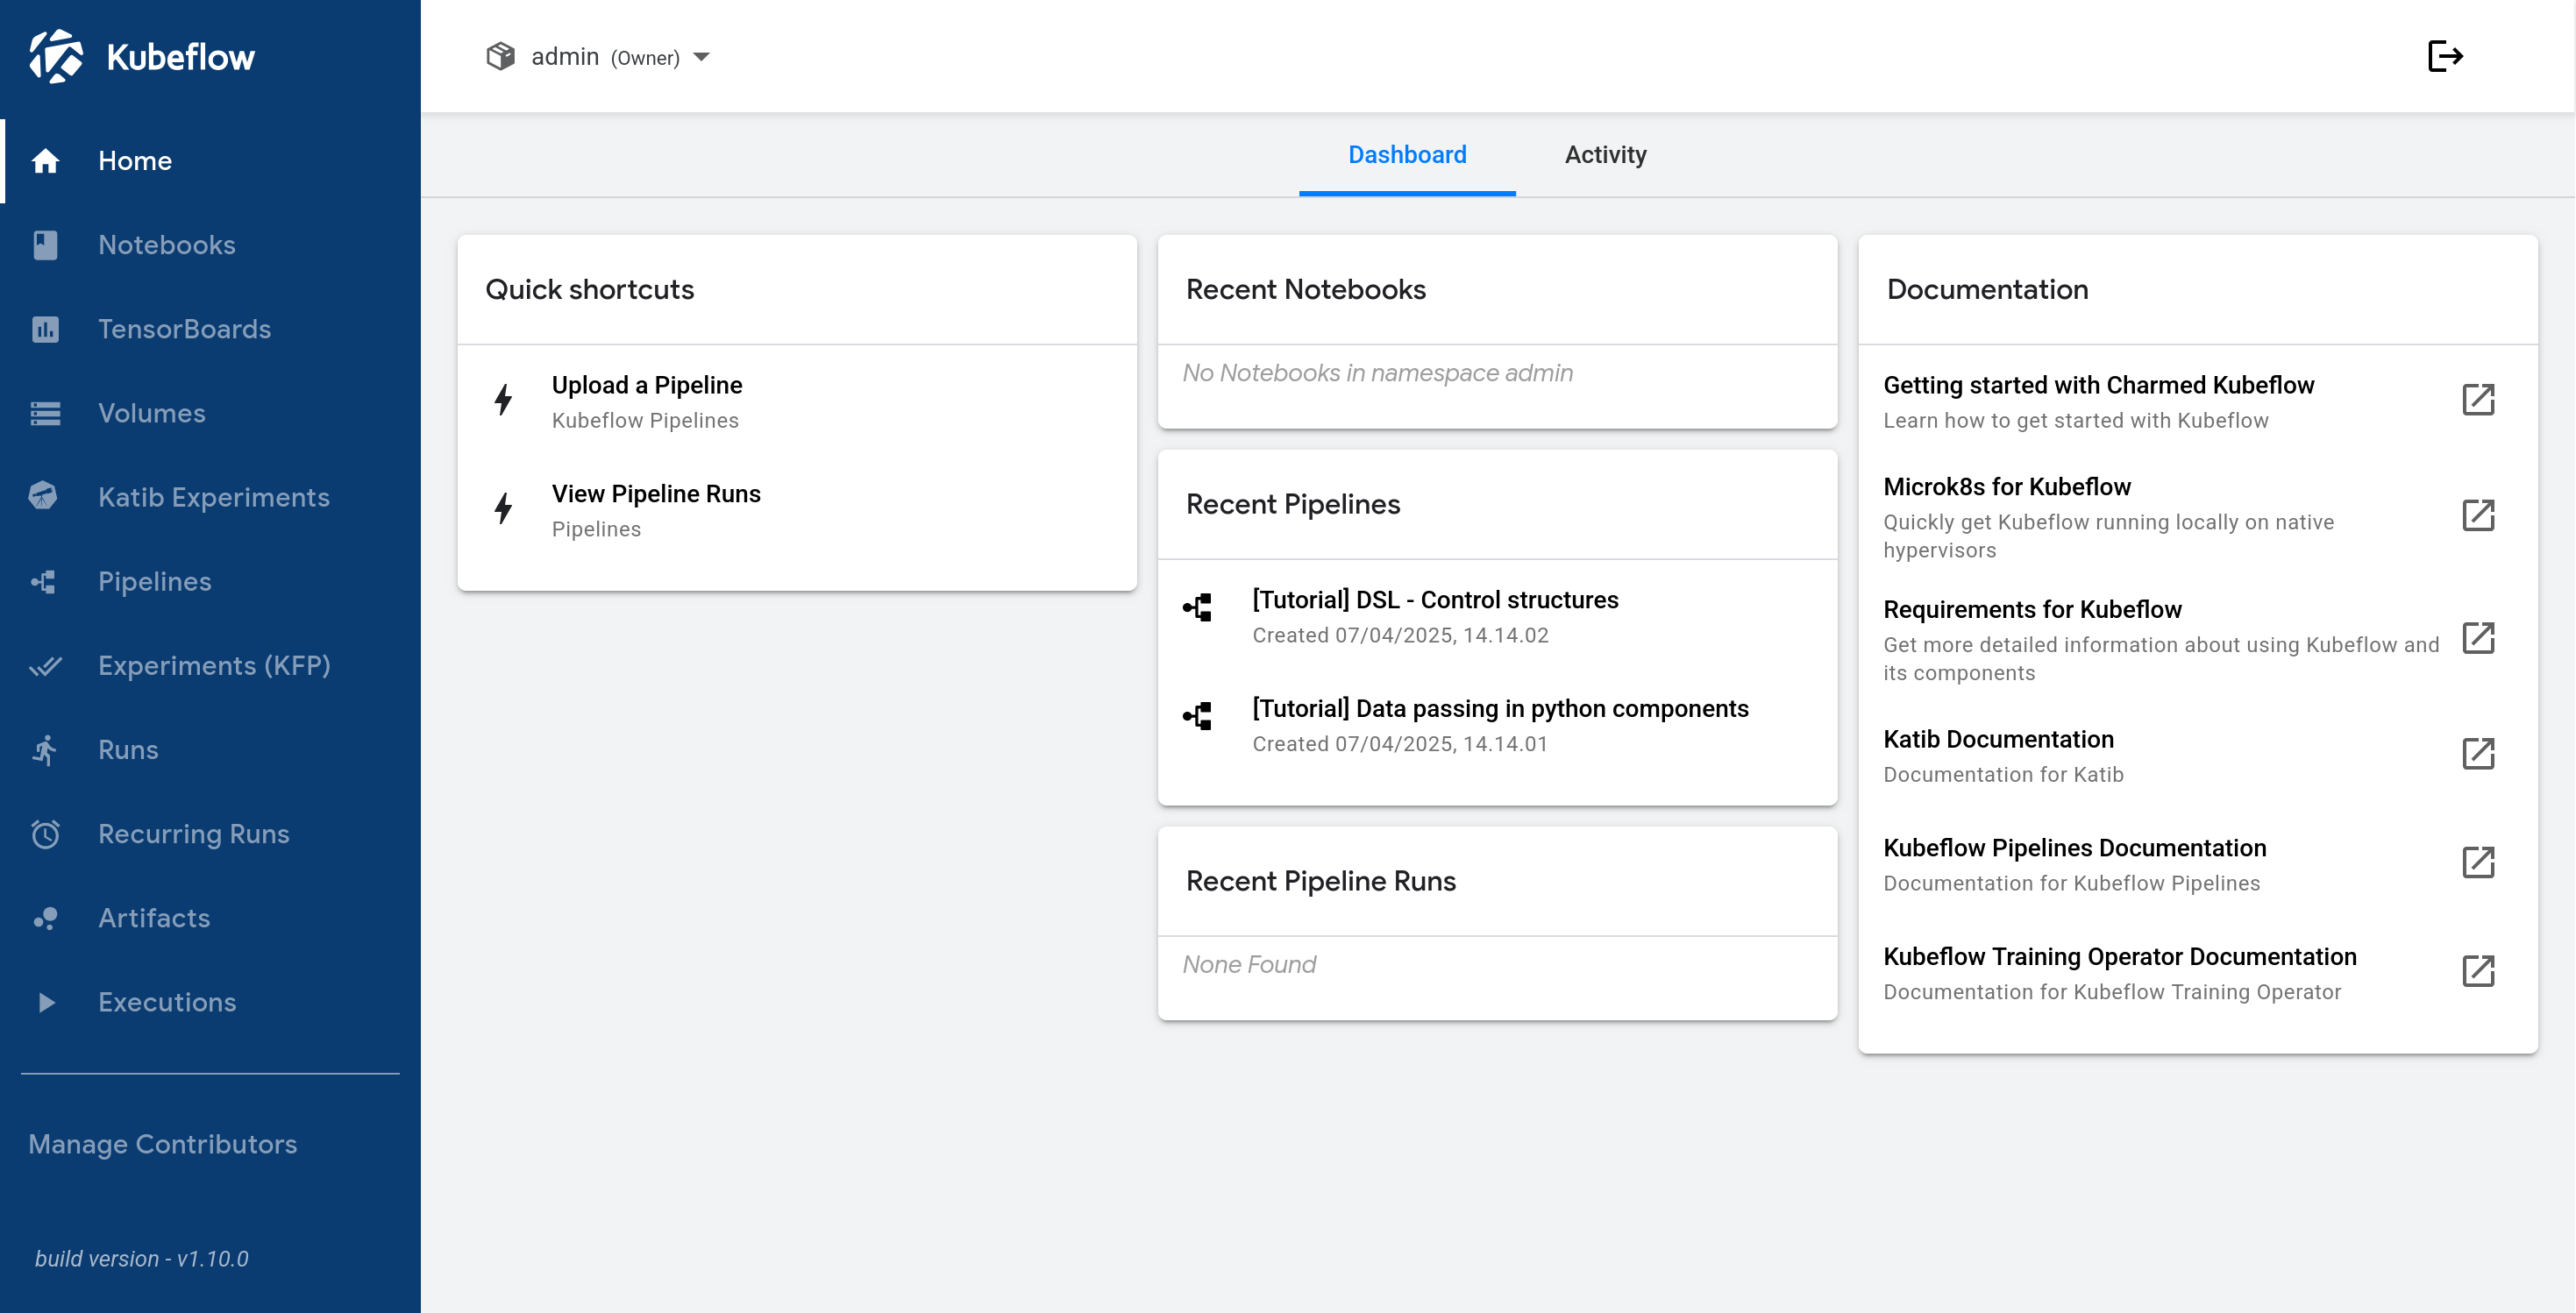
Click on Finish to display the dashboard:
dashboard

Next steps

I ran through the above tutorial, but had some issues with the MetalLB configuration. For me, I didn’t have the 10.64.140.0/24 network set up after installing MicroK8s. The documentation reads like this is automatically set up as a side effect of installing MicroK8s, but that’s not what I saw.

I needed to set up a Linux bridge for that network in order to land my MicroK8s node on that network so MetalLB could work. I created an LXD network as an easy way to set that up and to easily configure it so DHCP would avoid the MetalLB IP ranges - and that seemed to allow things to work for me.

Full disclosure: I had previously installed Microk8s on my system, but I did remove the snap (with --purge) prior to running through this tutorial, so my system should have been more-or-less “clean” before attempting the tutorial.

1 Like

Need to explain what MicroK8s is and why we install it.

We say that we need to wait for MK8s to complete config, what is the state that I need to wait for ?

does not work

[quote=“nohaihab, post:1, topic:7819”]

microk8s enable dns storage ingress metallb:10.64.140.43-10.64.140.49

[/quote]DEPRECIATION WARNING: ‘storage’ is deprecated and will soon be removed. Please use ‘hostpath-storage’ instead.

storage is deprecated, and should be hostpath-storage as per the warning when you execute the enable:

DEPRECIATION WARNING: 'storage' is deprecated and will soon be removed. Please use 'hostpath-storage' instead.

it’s also good to specify dns:{your upstream dns server} if google dns is not reachable otherwise it won’t work.

Any details about how to do this? I have the same issue. The istio-pilot waiting for ip address

Thanks - updated now and also in the MLflow one.

Hey! What do you get when you run this:

microk8s kubectl -n kubeflow get svc istio-ingressgateway-workload -o jsonpath='{.status.loadBalancer.ingress[0].ip}'

After installation I cannot access the dashboard at http://10.64.140.43.nip.io, ‘the site can’t be reached.’

microk8s kubectl get gateway -A NAMESPACE NAME AGE knative-serving knative-ingress-gateway 107m knative-serving knative-local-gateway 107m

juju config dex-auth public-url=http://10.64.140.43.nip.io WARNING the configuration setting “public-url” already has the value “http://10.64.140.43.nip.io”

The istio looks fine: istio-ingressgateway-workload LoadBalancer 10.152.183.197 10.64.140.43 80:30302/TCP,443:30118/TCP 97m

My laptop is running on 2 ips: the wired is on 10.64.140.38 and the Wifi is on 192.168.12.149

So I got this 10.64.140.43. Since my Wifi interface is on 192.168.12.149 I connected my wired LAN to another router. I assume since the laptop and the service IP are on the same block I should be able to access it?

Followed the instruction and reinstalled many times with clean microk8s and juju. It seems the following errors are common across all my installations:

> App                        Version                Status   Scale  Charm                    Channel         Rev  Address         Exposed  Message
> katib-controller           res:oci-image@111495a  waiting      1  katib-controller         0.15/stable     206  10.152.183.117  no
> kfp-api                    res:oci-image@e08e41d  waiting      1  kfp-api                  2.0/stable      298  10.152.183.4    no
> kfp-persistence            res:oci-image@516e6b8  waiting      1  kfp-persistence          2.0/stable      294                  no
> tensorboard-controller                            waiting      1  tensorboard-controller   1.7/stable      156                  no       Waiting for gateway info relation
> Unit                          Workload  Agent  Address       Ports              Message
> katib-controller/0*           error     idle   10.1.216.91   443/TCP,8080/TCP   crash loop backoff: back-off 5m0s restarting failed container=katib-controller pod=katib-controller-54846dbdbf-krk6z_...
> kfp-api/0*                    error     idle   10.1.216.92   8888/TCP,8887/TCP  crash loop backoff: back-off 5m0s restarting failed container=ml-pipeline-api-server pod=kfp-api-5cd4db4554-n76qf_kub...
> kfp-persistence/0*            error     idle   10.1.216.3                       crash loop backoff: back-off 5m0s restarting failed container=ml-pipeline-persistenceagent pod=kfp-persistence-5bbb9d...
> tensorboard-controller/0*     waiting   idle                                    Waiting for gateway info relation

Also the machine has wireless card connected to the internet that has 192.168.12.xxx address and a LAN card on 10.40.140.xxx block. I also added 10.40.140.43.nip.io to the host file after seeing ns lookup failure.

Hey did you try this:

An issue you might have is the tensorboard-controller component might be stuck with a status of waiting and a message “Waiting for gateway relation”. To fix this, run:

juju run --unit istio-pilot/0 -- "export JUJU_DISPATCH_PATH=hooks/config-changed; ./dispatch"

This is a known issue, see tensorboard-controller GitHub issue for more info.

Hey,

So maybe there’s a conflict with your LAN.

The tutorial assumes the Kubeflow dashboard will be accessible at http://10.64.140.43.nip.io. Considering that your laptop is running on two IP addresses and one of them is mentioned as 10.64.140.38, there’s a possibility that you are already on a local area network (LAN) that uses the IP address range 10.64.140.0/24, which includes the IP address 10.64.140.43 mentioned in the tutorial.

To resolve this, you can try the following steps:

  1. Confirm the IP address range being used by your local network. Check if the range overlaps with the IP address 10.64.140.43. If there’s a conflict, it can prevent you from accessing the Kubeflow dashboard.
  2. If a conflict exists, you can modify the IP address range specified in the tutorial’s configuration. For example, let’s say you want to change the IP address to 10.64.141.43 to avoid conflicts. Run the following command instead of the original microk8s enable command:
microk8s enable dns hostpath-storage ingress metallb:10.64.141.43-10.64.141.49

This will set up the private IP address 10.64.141.43 as accessible within your VM environment.

Note: I haven’t tested this specific configuration myself, it’s just an idea

> App                        Version                  Status   Scale  Charm                    Channel         Rev  Address         Exposed  Message
> kfp-api                    res:oci-image@e08e41d    waiting      1  kfp-api                  2.0/stable      298  10.152.183.106  no
> kfp-persistence            res:oci-image@516e6b8    waiting      1  kfp-persistence          2.0/stable      294                  no
> Unit                          Workload  Agent  Address       Ports              Message
> kfp-api/0*                    error     idle   10.1.216.122  8888/TCP,8887/TCP  crash loop backoff: back-off 5m0s restarting failed container=ml-pipeline-api-server pod=kfp-api-6658f6984b-dd8mp_kub...
> kfp-persistence/0*            error     idle   10.1.216.123                     crash loop backoff: back-off 5m0s restarting failed container=ml-pipeline-persistenceagent pod=kfp-persistence-5d7987...

The errors are pretty consistent across my installation attempts.

Also when I finally get to the Dashboard it stuck at ‘creating namespace’. After the namespace created it stays at the same page. When you back off and click the ‘Finish’ again it tells you the namespace already exists.

Could be an issue with microk8s and the default inotify limits. Did you run this?

Thanks!. That solved the problem.

1 Like

Error with juju deploy:

Located charm "tensorboards-web-app" in charm-hub, channel 1.7/stable
Located charm "training-operator" in charm-hub, channel 1.6/stable
ERROR lost connection to pod
ERROR cannot deploy bundle: cannot resolve charm or bundle "jupyter-ui": connection is shut down

Tried several times and it seems that the ERROR happened at different stages each time. I am doing it on a 3 node cluster on microk8s

Hi Andrew, can you run some commands to inspect / diagnose / debug what’s going on and let us know what’s happening?

Here are just some ideas:

  • What are the results of microk8s status and juju status
  • Use kubectl to get more info about what’s going on: get / describe / logs
  • Check your network connectivity between the microk8s nodes
  • Try sshing into the pods and see what happens

Also describe in as much detail steps to reproduce your exact setup, including the machine specs (RAM, OS etc.) you’re using, what cloud provider if in the cloud, how you setup the microk8s cluster etc.

Try to get as much info as you can for us, and then ping us back here with all the info. Then we’ll take it from there.

Tried on a clean new Ubuntu install (1 node only) following the documents with microk8s and this. Here is the screen.

andrew@G9:~$ juju bootstrap microk8s
Creating Juju controller "microk8s-localhost" on microk8s/localhost
Bootstrap to Kubernetes cluster identified as microk8s/localhost
Fetching Juju Dashboard 0.8.1
Creating k8s resources for controller "controller-microk8s-localhost"
Starting controller pod
Bootstrap agent now started
Contacting Juju controller at 10.152.183.148 to verify accessibility...
ERROR lost connection to pod

Bootstrap complete, controller "microk8s-localhost" is now available in namespace "controller-microk8s-localhost"

Now you can run juju add-model to create a new model to deploy k8s workloads.

For the previous install I ignored this ERROR and continued with add-model. I think this is the root of the problem. The network settings:

> 1: lo: <LOOPBACK,UP,LOWER_UP> mtu 65536 qdisc noqueue state UNKNOWN group default qlen 1000
> link/loopback 00:00:00:00:00:00 brd 00:00:00:00:00:00
> inet 127.0.0.1/8 scope host lo
>    valid_lft forever preferred_lft forever
> inet6 ::1/128 scope host 
>    valid_lft forever preferred_lft forever
> 2: enp3s0: <NO-CARRIER,BROADCAST,MULTICAST,UP> mtu 1500 qdisc mq state DOWN group default qlen 1000
> link/ether ec:aa:a0:18:45:bf brd ff:ff:ff:ff:ff:ff
> 3: wlp2s0: <BROADCAST,MULTICAST,UP,LOWER_UP> mtu 1500 qdisc noqueue state UP group default qlen 1000
> link/ether 9c:b6:d0:0c:eb:35 brd ff:ff:ff:ff:ff:ff
> inet 192.168.12.100/24 brd 192.168.12.255 scope global dynamic noprefixroute wlp2s0
>    valid_lft 41777sec preferred_lft 41777sec
> inet6 2607:fb91:87e:825a:856:6482:8976:6010/128 scope global dynamic noprefixroute 
>    valid_lft 2180sec preferred_lft 830sec
> inet6 2607:fb91:87e:825a:1ed6:460:ed44:1905/64 scope global temporary dynamic 
>    valid_lft 86149sec preferred_lft 14149sec
> inet6 2607:fb91:87e:825a:9b37:9d88:b462:b6fa/64 scope global dynamic mngtmpaddr noprefixroute 
>    valid_lft 86149sec preferred_lft 14149sec
> inet6 fe80::6c92:966f:6ff9:8f06/64 scope link noprefixroute 
>    valid_lft forever preferred_lft forever
> 6: vxlan.calico: <BROADCAST,MULTICAST,UP,LOWER_UP> mtu 1450 qdisc noqueue state UNKNOWN group default 
> link/ether 66:c8:18:67:df:7a brd ff:ff:ff:ff:ff:ff
> inet 10.1.243.128/32 scope global vxlan.calico
>    valid_lft forever preferred_lft forever
> inet6 fe80::64c8:18ff:fe67:df7a/64 scope link 
>    valid_lft forever preferred_lft forever
> 7: calica2d35e61c3@if3: <BROADCAST,MULTICAST,UP,LOWER_UP> mtu 1500 qdisc noqueue state UP group default 
> link/ether ee:ee:ee:ee:ee:ee brd ff:ff:ff:ff:ff:ff link-netns cni-5110dfe6-5021-3929-7c13-826d6ff19ee8
> inet6 fe80::ecee:eeff:feee:eeee/64 scope link 
>    valid_lft forever preferred_lft forever
> 8: cali32780c3cbff@if3: <BROADCAST,MULTICAST,UP,LOWER_UP> mtu 1500 qdisc noqueue state UP group default 
> link/ether ee:ee:ee:ee:ee:ee brd ff:ff:ff:ff:ff:ff link-netns cni-dbaaddb1-bc74-3af9-4ecb-13bc54c630de
> inet6 fe80::ecee:eeff:feee:eeee/64 scope link 
>    valid_lft forever preferred_lft forever
> 9: calicb43c72bc0b@if3: <BROADCAST,MULTICAST,UP,LOWER_UP> mtu 1500 qdisc noqueue state UP group default 
> link/ether ee:ee:ee:ee:ee:ee brd ff:ff:ff:ff:ff:ff link-netns cni-c2fb5bc9-a1a0-5f1c-b3c1-16e679ecc7f9
> inet6 fe80::ecee:eeff:feee:eeee/64 scope link 
>    valid_lft forever preferred_lft forever
> 10: calic40d2f9fe91@if3: <BROADCAST,MULTICAST,UP,LOWER_UP> mtu 1500 qdisc noqueue state UP group default 
> link/ether ee:ee:ee:ee:ee:ee brd ff:ff:ff:ff:ff:ff link-netns cni-94b4a477-f3fd-f732-bfd1-e1f85c8ace54
> inet6 fe80::ecee:eeff:feee:eeee/64 scope link 
>    valid_lft forever preferred_lft forever
> 11: calicd215964915@if3: <BROADCAST,MULTICAST,UP,LOWER_UP> mtu 1500 qdisc noqueue state UP group default 
> link/ether ee:ee:ee:ee:ee:ee brd ff:ff:ff:ff:ff:ff link-netns cni-dc847b39-d6d1-4672-a176-99b4fc226b48
> inet6 fe80::ecee:eeff:feee:eeee/64 scope link 
>    valid_lft forever preferred_lft forever
> 13: cali2866693e52b@if3: <BROADCAST,MULTICAST,UP,LOWER_UP> mtu 1500 qdisc noqueue state UP group default 
> link/ether ee:ee:ee:ee:ee:ee brd ff:ff:ff:ff:ff:ff link-netns cni-84a8ae58-9fbe-be94-7ada-6c63ac16b0e8
> inet6 fe80::ecee:eeff:feee:eeee/64 scope link 
>    valid_lft forever preferred_lft forever
> 14: calibe02fed43bb@if3: <BROADCAST,MULTICAST,UP,LOWER_UP> mtu 1500 qdisc noqueue state UP group default 
> link/ether ee:ee:ee:ee:ee:ee brd ff:ff:ff:ff:ff:ff link-netns cni-a1aa2784-d203-f334-443a-83d33fd7c3d1
> inet6 fe80::ecee:eeff:feee:eeee/64 scope link 
>    valid_lft forever preferred_lft forever

The only time I ever saw Juju hanging was because I didn’t have enough disk space.

What are your machine specs for the machine are you running Juju / microk8s on? Do they satisfy all the requirements from the tutorial?

  • Runs Ubuntu 20.04 (focal) or later.
  • Has at least 4 cores, 32GB RAM and 50GB of disk space available.
  • Is connected to the internet for downloading the required snaps and charms.
  • Has python3 installed.