
| Key | Value |
|---|---|
| Summary | Using VScode on Charmed Kubeflow |
| Categories | docs, kubeflow |
| Difficulty | 1 |
| Author | Rob Gibbon |
Overview
Duration: 1:00
Charmed Kubeflow delivers a powerful, sophisticated end-to-end MLOps platform which you can deploy in half an hour or less, using MicroK8s or another conformant Kubernetes distribution.
Charmed Kubeflow amplifies data scientists’ productivity in many ways - from workflow automation using Kubeflow Pipelines, to automated hyperparameter tuning using Katib, to research and development with JupyterLab. In this tutorial, we’ll examine using an alternative development environment to JupyterLab on Charmed Kubeflow - VSCode.
What you’ll learn
- A quick introduction to VSCode
- How to get VSCode up and running on Charmed Kubeflow
What you’ll need
- We recommend using a MicroK8s cluster with one or more nodes running Charmed Kubeflow – see the install guide to get up and running – but any conformant Kubernetes cluster should work fine
- A basic understanding of Kubeflow – see the Kubeflow basics guide for a refresher
Data Labs on Charmed Kubeflow
Duration: 10:00
Charmed Kubeflow allows data scientists and engineers to rapidly develop sophisticated machine learning (ML) and artificial intelligence (AI) models, advanced analytics, and data engineering pipelines at scale by scheduling their jobs and workflows on Kubernetes clusters.
During the research and development phase though, data scientists and engineers need a lab environment where they can develop their models, data preparation and feature engineering scripts, and other items like visualisations and analyses. Whilst most typically data scientists want to use JupyterLab for this, there are some other options available on Charmed Kubeflow, most notably VSCode.
What is VSCode?
VSCode is the successor to Microsoft Visual Studio and offers a free, integrated development environment for developing software of all kinds, ranging from writing Python-based ETL scripts to developing JavaScript web applications, Julia-based data science, or pretty much anything else you can think of.
Launching VSCode on Charmed Kubeflow
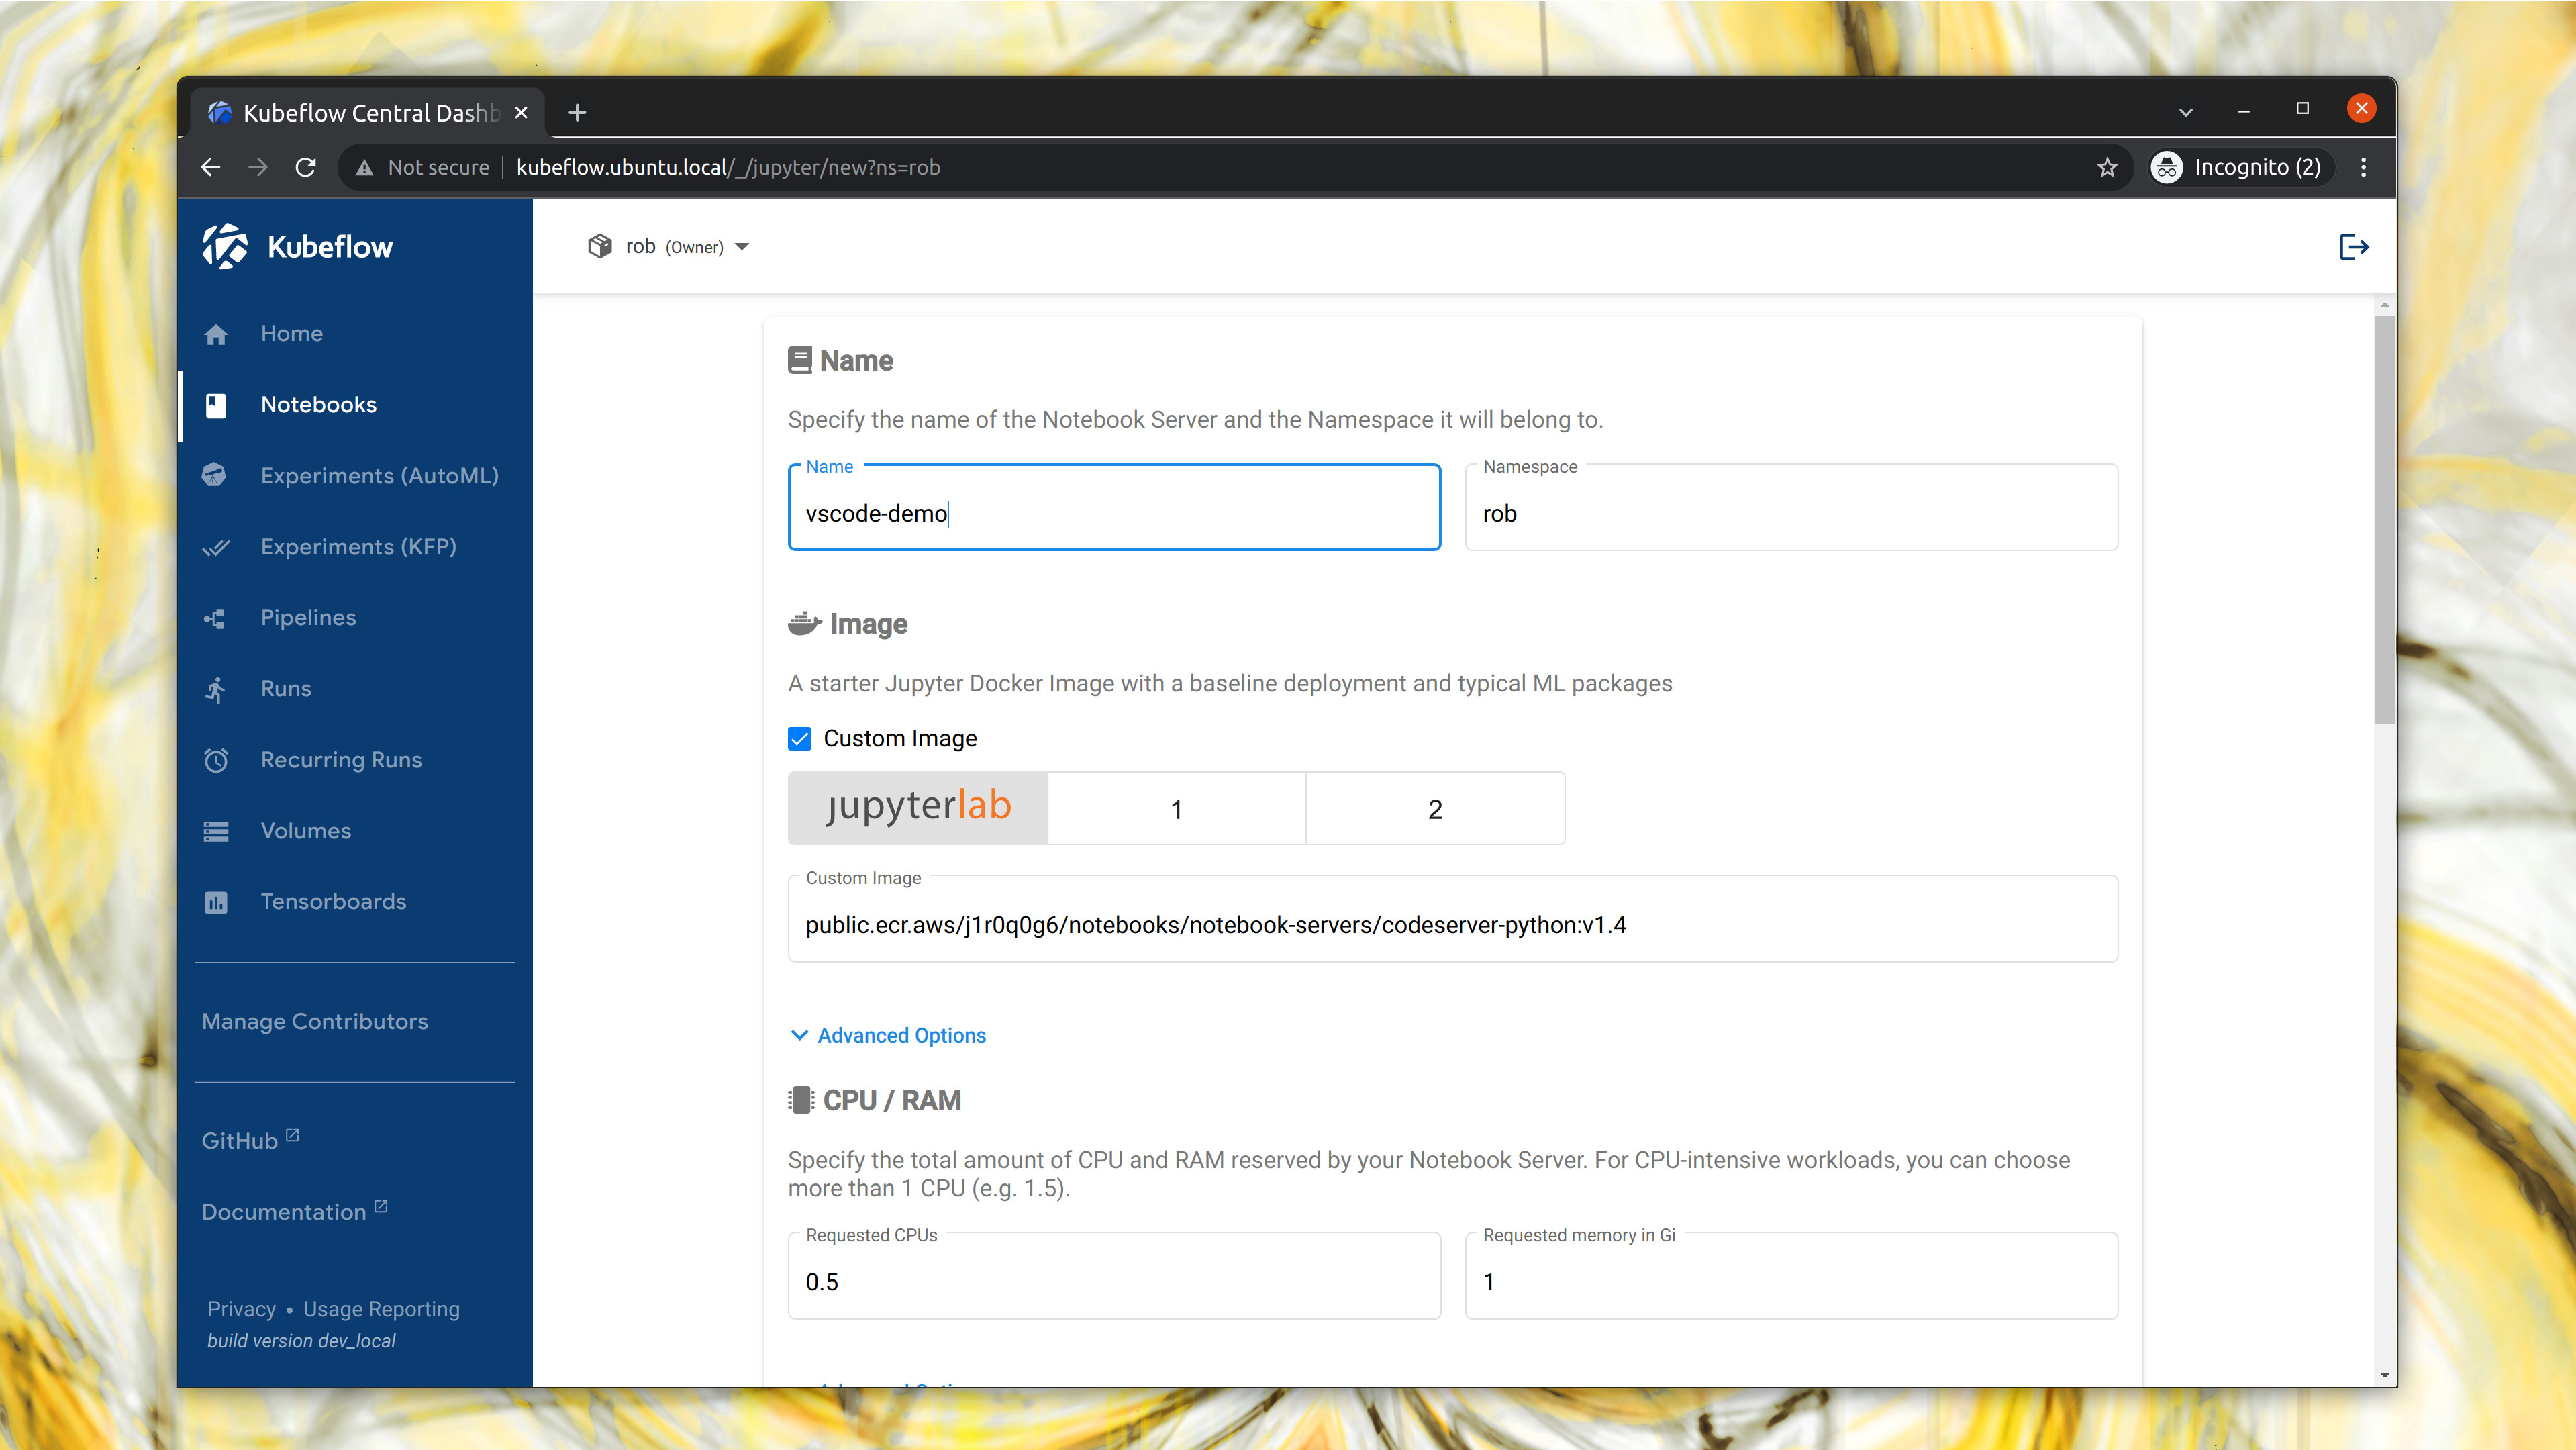
Let’s launch VSCode now. From the Kubeflow Dashboard, navigate to “Notebooks” and click “New Notebook”.

In the next screen, enter a name for the notebook server. You could call it “vscode”. Check the box labelled “Custom Image” and in the field below, enter the following image name:
public.ecr.aws/j1r0q0g6/notebooks/notebook-servers/codeserver-python:v1.4
Choose how much RAM, how many CPU cores and any GPUs that you want to assign, then scroll down and click “Launch”.
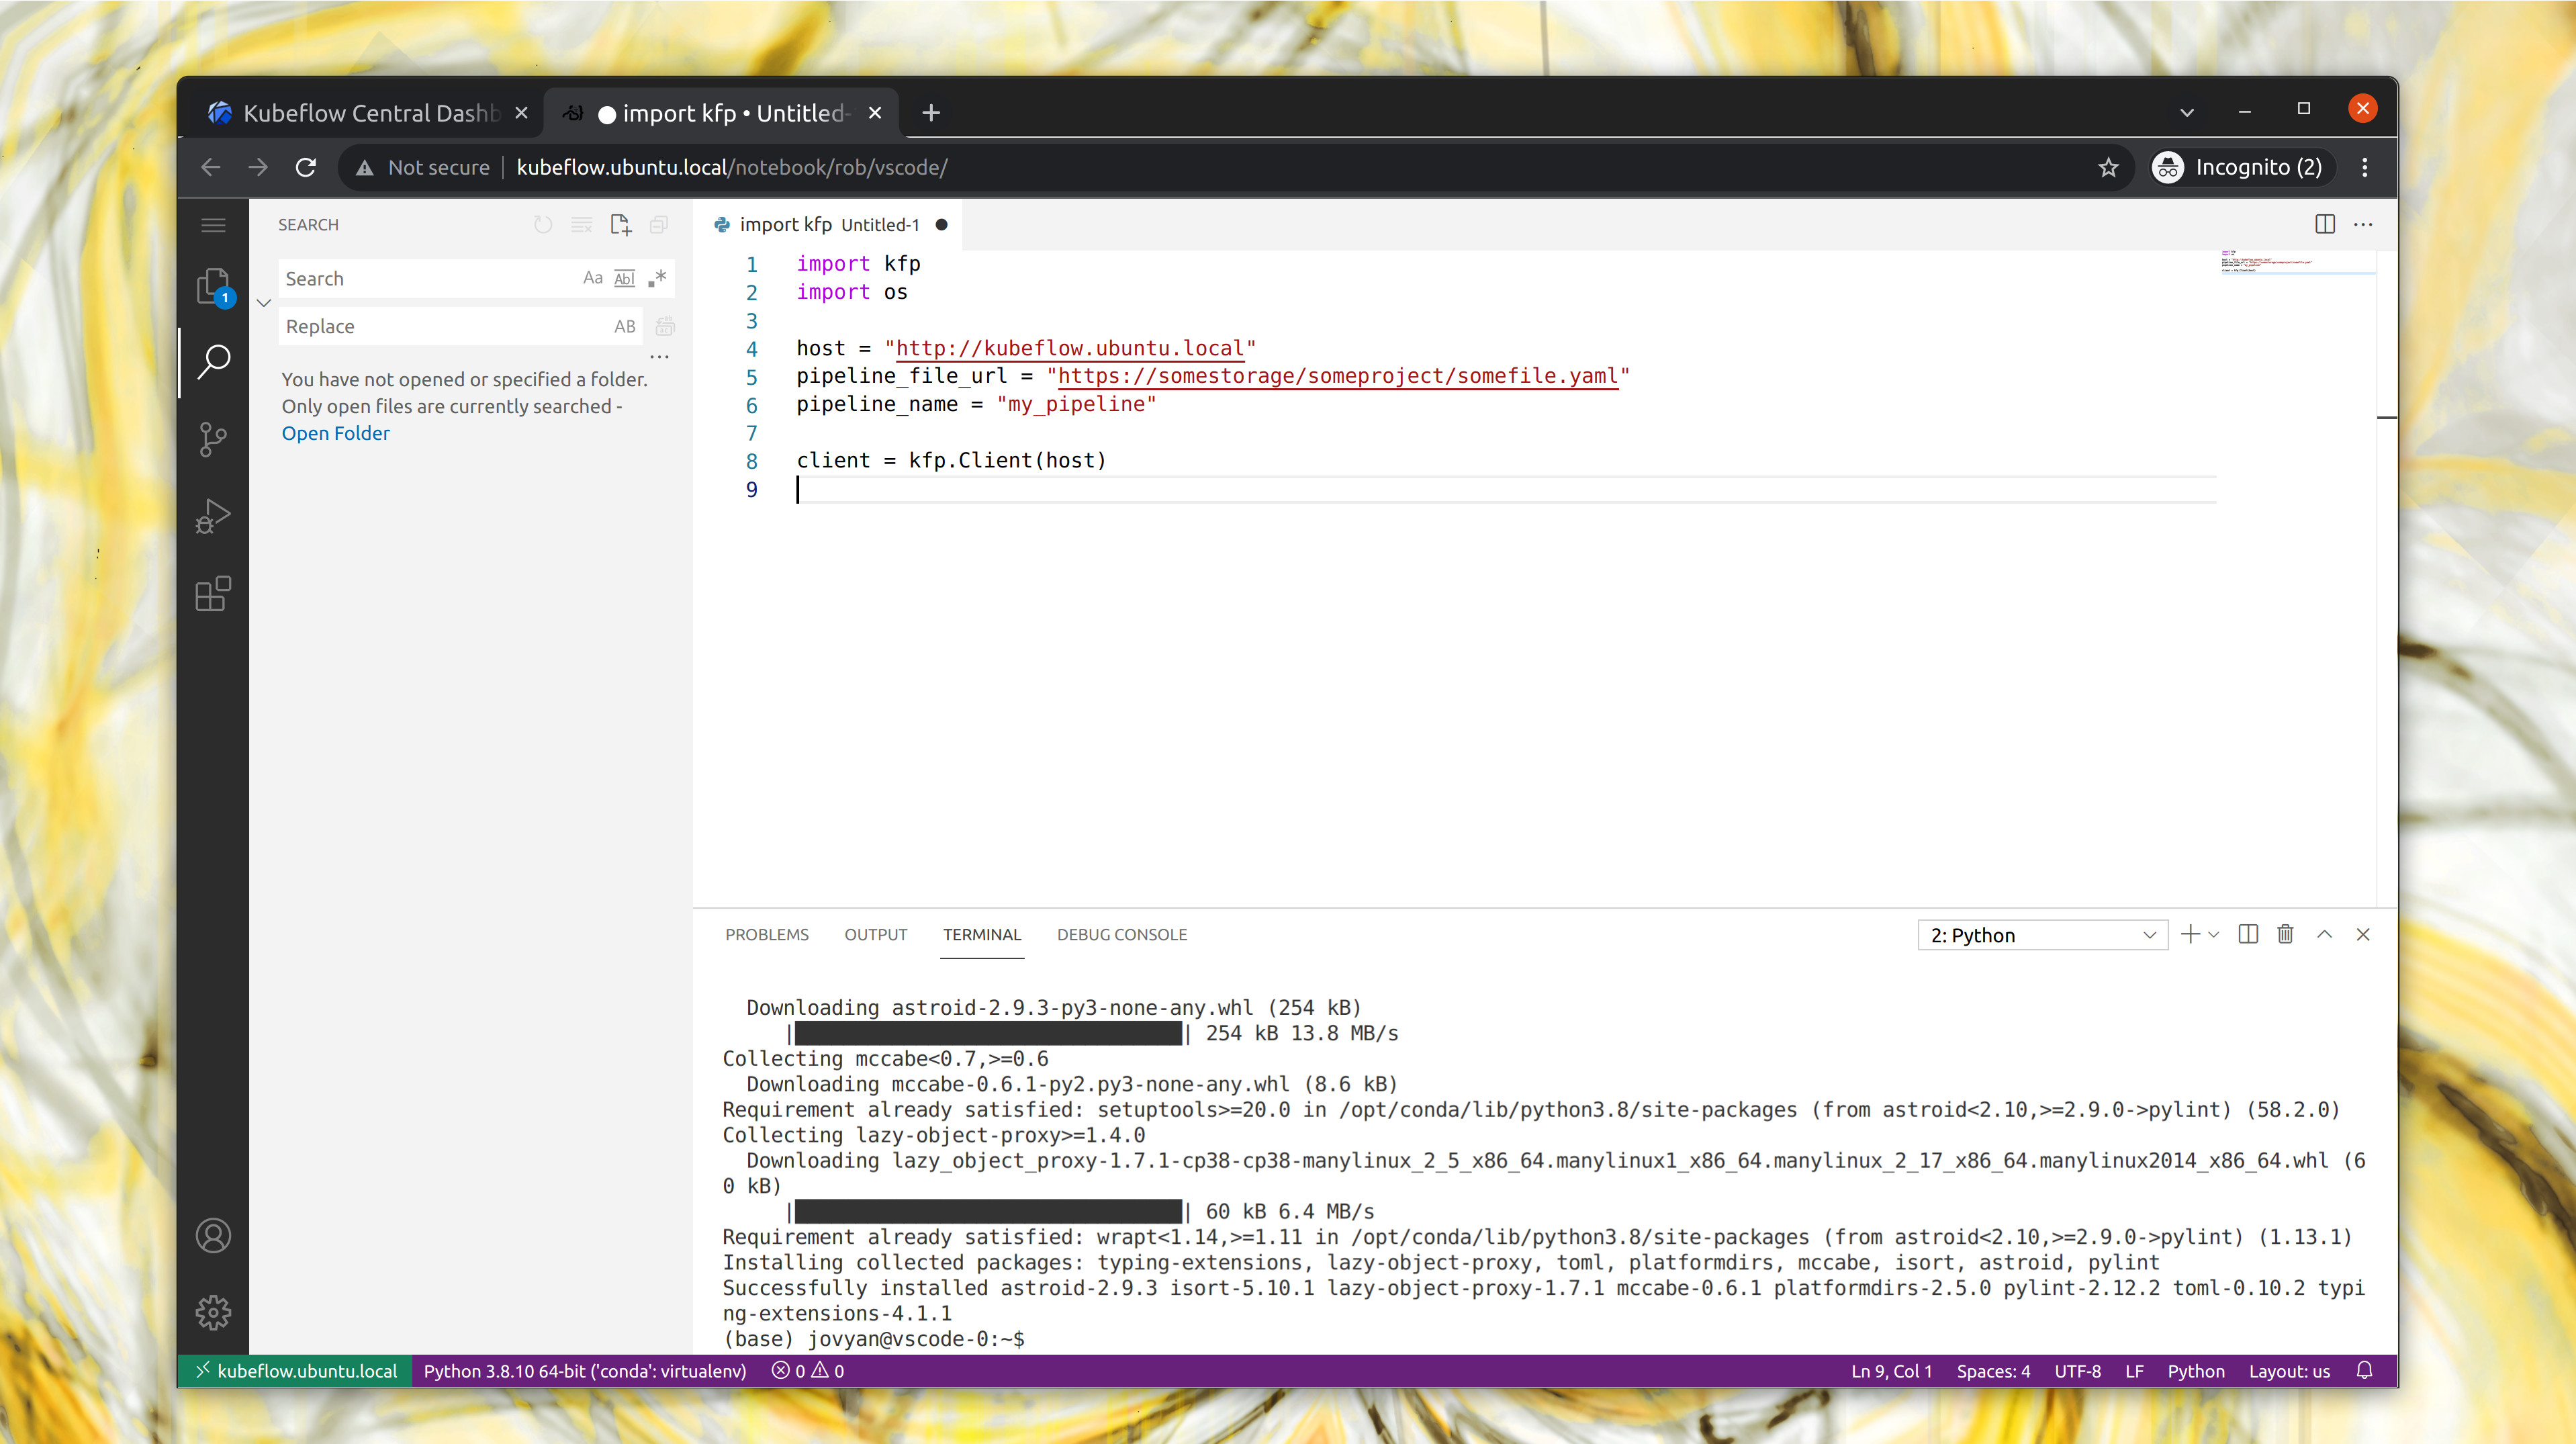
Charmed Kubeflow will now start the VSCode server for you, and after a few moments a green tick will appear, signalling that you can connect to the IDE. Click “Connect” and a new browser tab will open.

In the new browser tab, you will see VSCode running, ready to go. You can create new files, install plugins, clone git repositories and most of the other things you would expect to be able to do.
Have fun
Duration: 1:00
Now you know how to get started with using VSCode as an alternative to JupyterLab on Charmed Kubeflow for research and analysis, developing and testing data engineering pipelines, feature engineering, model training and validation, to automate hyperparameter search or even deployment workflows. Have fun and let us know how you get on in the forum.
Further reading
Duration: 1:00
Have questions? Contact our sales team now.