
| Key | Value |
|---|---|
| Summary | Visual workflow design with Charmed Kubeflow and Elyra |
| Categories | kubeflow |
| Difficulty | 2 |
| Author | Rob Gibbon |
Contents:
- Overview
- What you’ll learn
- What you’ll need
- Create a JupyterLab Notebook Server
- Configure Elyra for Kubeflow Pipelines
- Grab an example workflow to help understand Elyra
- Submit an Elyra pipeline job
- Checking the job in Kubeflow Pipelines
- Recurring runs
- Reviewing some results
- Building a simple flow with Elyra
- It’s a wrap
- Further reading
Overview
Duration: 2:00
Charmed Kubeflow delivers a powerful, sophisticated end-to-end MLOps platform which you can deploy in half an hour or less, using MicroK8s or another conformant Kubernetes distribution.
Charmed Kubeflow offers a radically transformative approach to building data engineering pipelines and AI/ML workflows based on containers, Kubernetes, open source software and the internet. As such the Charmed Kubeflow platform can dramatically amplify productivity levels for data scientists and engineers working with advanced analytics and AI.
Kubeflow Pipelines is the powerful workflow engine at the heart of the Charmed Kubeflow MLOps platform. The pipelines are defined using the ubiquitous YAML markup language, with pipeline steps developed in a Python DSL. Whilst incredibly powerful and highly optimised for rigorous GitOps-driven environments, the learning curve can be deterring for some data scientists.
In this tutorial, we will examine Elyra, a visual workflow design engine for Kubeflow Pipelines that can help to get you started with Charmed Kubeflow quickly and easily.
What you’ll learn
- How to get up and running with Elyra
- Some of the basic features of Elyra
- How to run a workflow with Elyra
- How Elyra works with Kubeflow Pipelines
- How to build a simple Elyra workflow
What you’ll need
- A Kubernetes cluster with one or more nodes running Charmed Kubeflow - see the install guide to get up and running
- Some command line knowledge
- Some knowledge of data science and data engineering concepts and technologies
Create a JupyterLab Notebook Server
Duration: 3:00
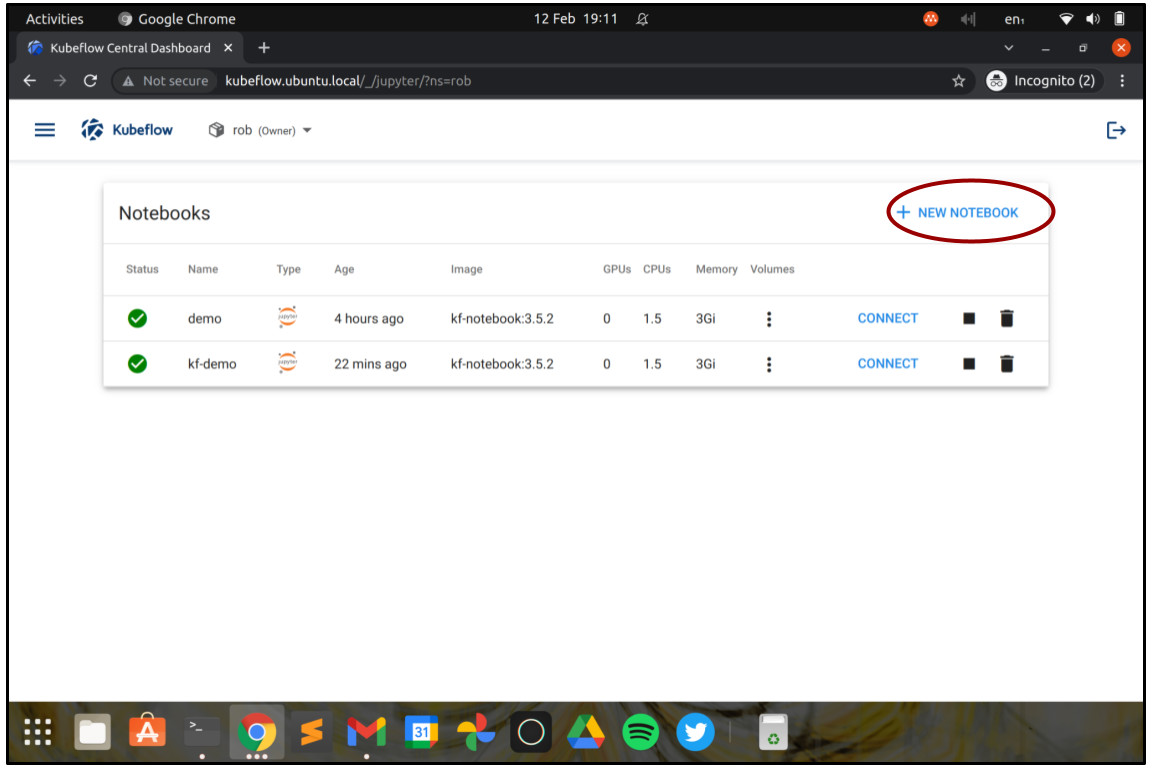
Let’s get started. From the Kubeflow Dashboard, choose Notebooks in the menu and click “Create a new Notebook”. JupyterLab notebooks are an incredibly powerful – yet easy to use, browser-based development environment for rapid software production, popular with data scientists.
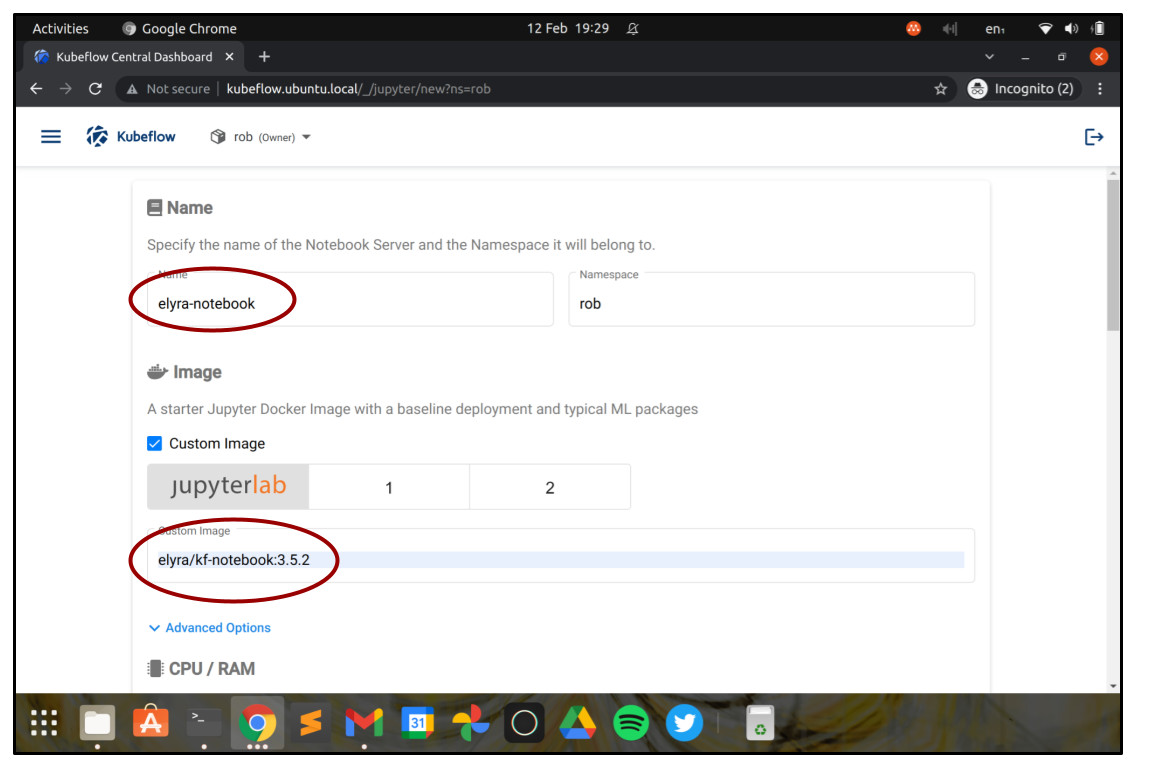
In the Create New Notebook screen, choose a Name for your Notebook Server, for example, “elyra-notebook”.
Check the checkbox “Choose custom image”, and enter the image name elyra/kf-notebook:3.5.2. This will launch the JupyterLab notebook environment with Elyra ready installed, so that we can use it right away for visual workflow design.
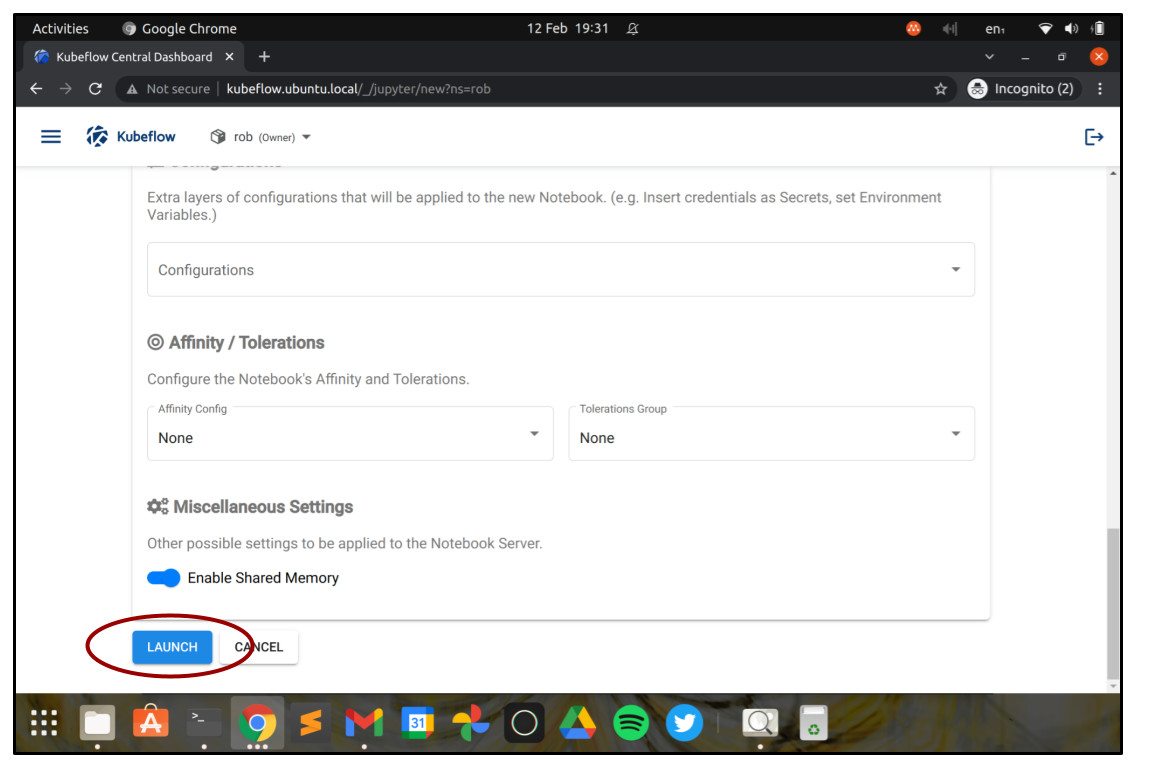
Leave the other sections with the default values for now, but know that you can use them to change things like the number of CPU cores, RAM, disks or GPUs available to the Notebook server. These values can be important when actively developing data science projects, but they’re not so critical to get started with Elyra, since the actual data science workload will be run as a batch on the Kubeflow Pipelines workflow engine.
Go ahead and click on Launch.
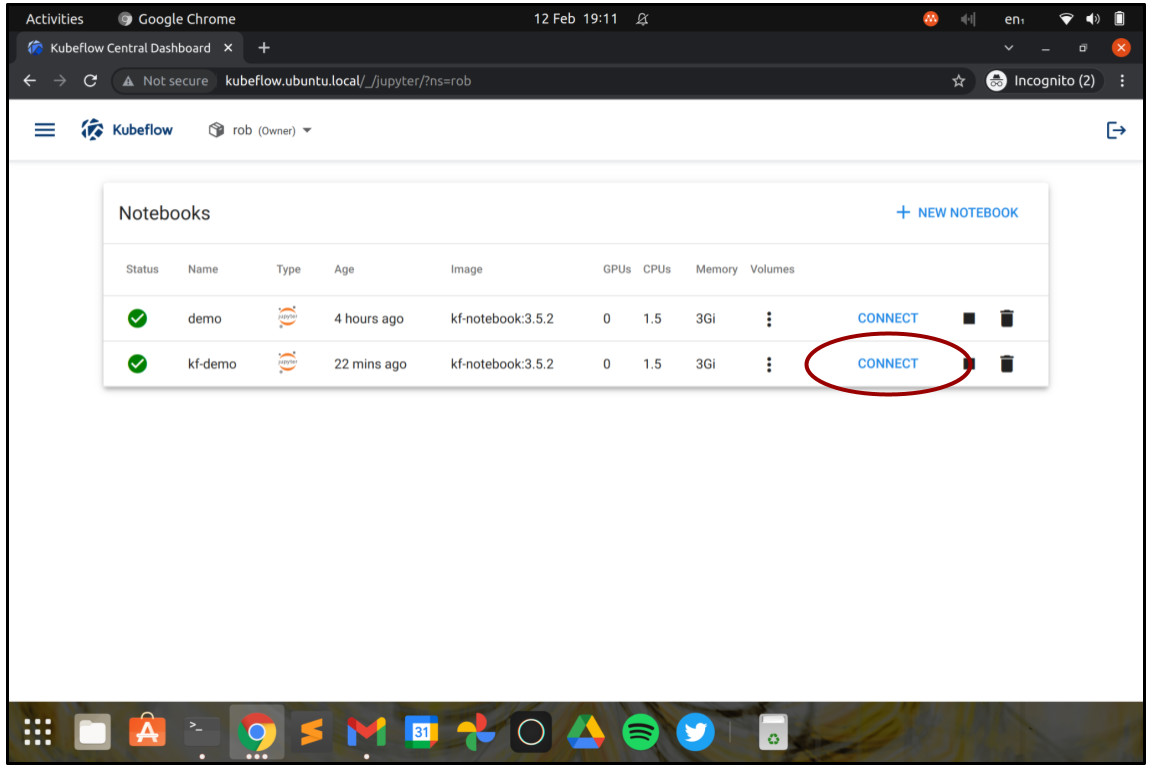
You should now return to the “Notebooks” screen and see your Notebook server starting up. Once the light turns green, you can connect to the Notebook server by clicking on the button marked “Connect”.
A new browser tab should appear, showing the JupyterLab launcher complete with Elyra workflow editor options. Congratulations so far!
Configure Elyra for Kubeflow Pipelines
Duration: 3:00
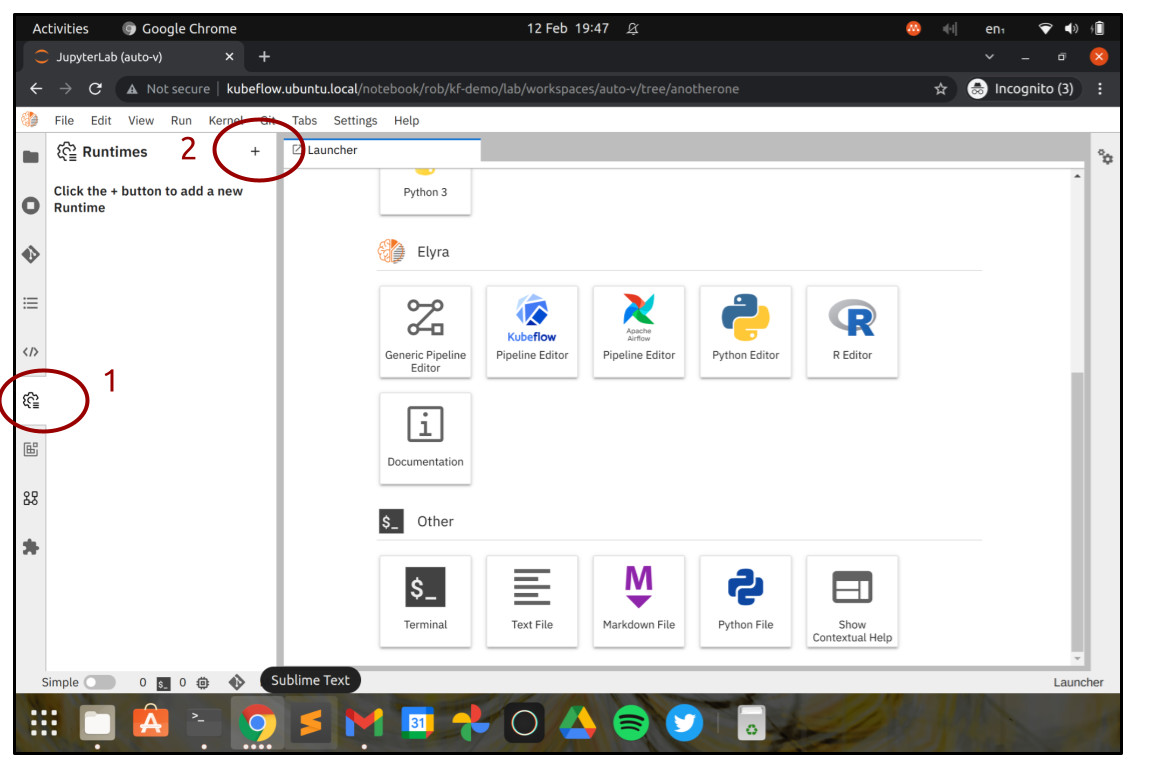
Before we can start using Elyra to visually design and run pipelines, we need to configure our Kubeflow Pipelines settings. So let’s do that. Look for the “Cog” icon in the left-hand menu, which is the Runtimes menu. Click that and then click “+” to add a new runtime, and then choose “New Kubeflow Pipelines Runtime Configuration”.
In the next screen, enter a name for the runtime. You could call it “kubeflow-demo” or something similar.
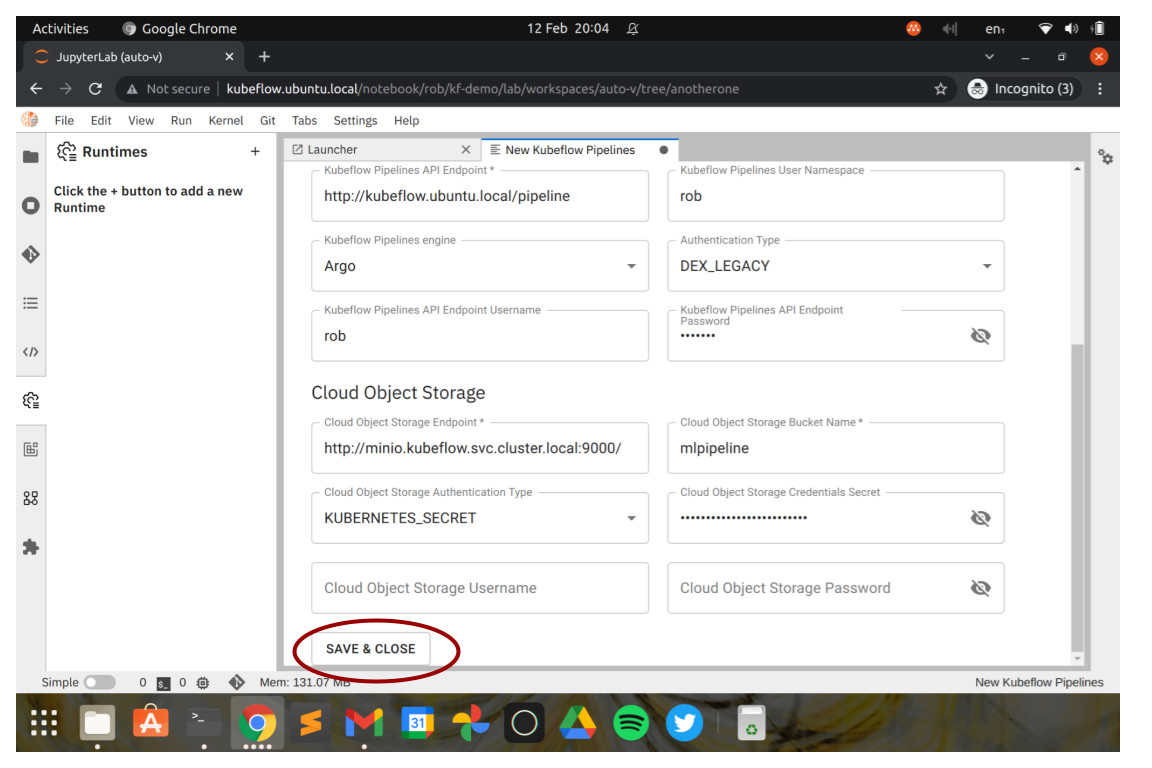
In the section “Kubeflow Pipelines”, add your Kubeflow endpoint. This is the URL you have configured for your users to access Charmed Kubeflow. You also need to specify the namespace your pipelines will run in. Usually the namespace is the same one as your Kubeflow workspace, so you should just enter your workspace’s name here.
For Charmed Kubeflow, the Kubeflow Pipelines Engine should be set to Argo, and the Authentication Type should be set to DEX_LEGACY or Kubernetes Service Account Token as preferred. If using DEX_LEGACY, you should enter your username and password in the fields below.
In the section “Cloud Object Storage”, you need to provide the details for Minio, which is the object store Charmed Kubeflow uses to store Kubeflow Pipeline definitions, intermediate data and results.
- The “Cloud Storage Endpoint” should be set to
http://minio.kubeflow.svc.cluster.local:9000/. - “Cloud Storage Bucket Name” should be
mlpipline. - For “Cloud Object Storage Authentication Type”, you can choose
USER_CREDENTIALS. - You will need your Minio credentials for this – you can get these using
juju config minio access-keyandjuju config minio secret-keyat the command line using your juju client.
When you’re ready, click “Save & Close”.
Grab an example workflow to help understand Elyra
Duration: 10:00
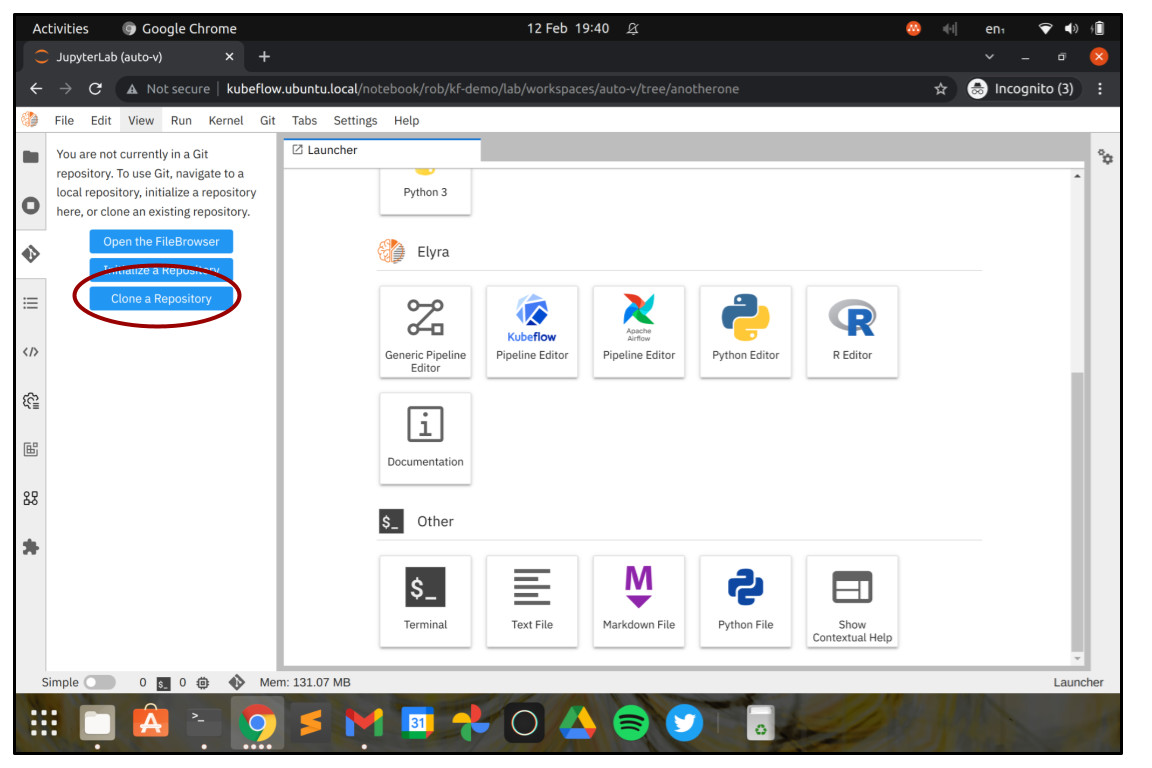
So now we have an environment up and running with Elyra, we will want to install an example workflow to better understand what Elyra is all about. Let’s do that now – in the left panel, look for the “Git” icon, and choose “Clone Repository” in the menu.
In the dialog box that comes up, enter https://github.com/CODAIT/covid-notebooks. We’ll use Elyra to run a statistical analysis on public data about the COVID-19 pandemic. It might take a moment to clone the Git repository from GitHub, but once finished you should see a directory called “covid-notebooks” in the topmost “Files” menu on the left. That directory contains all of the jupyter notebooks and the pipeline definitions that make up the analysis.
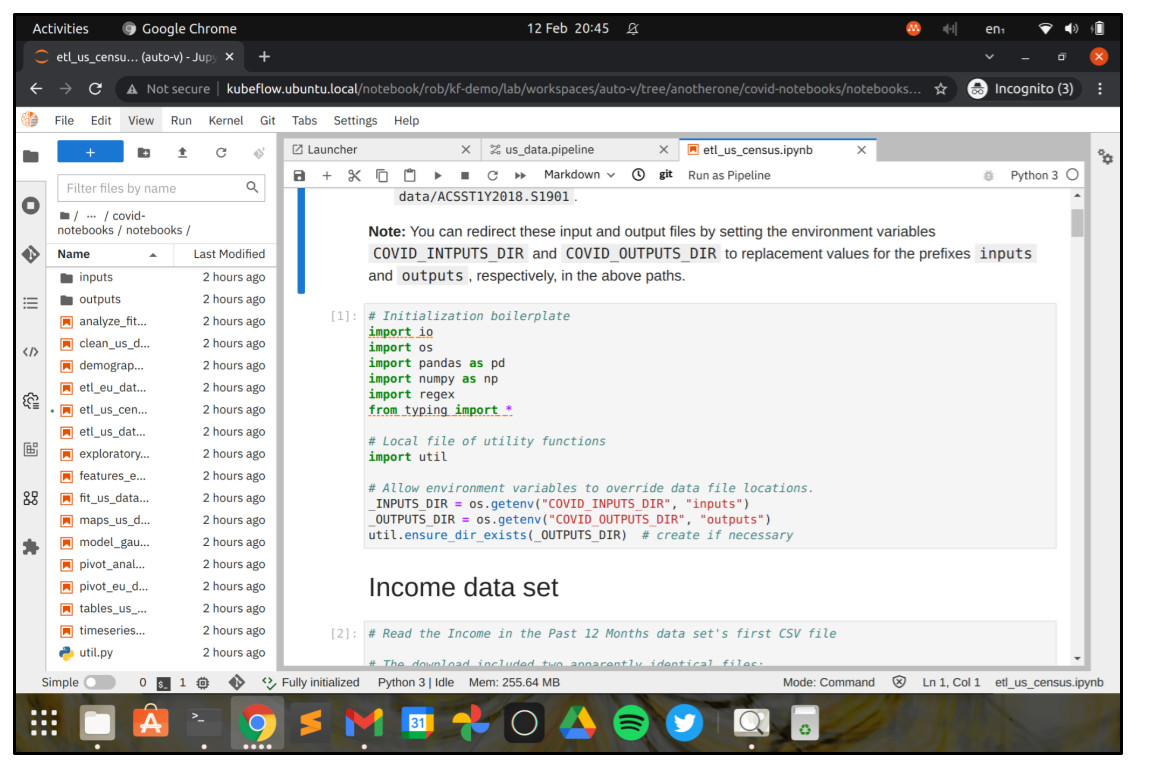
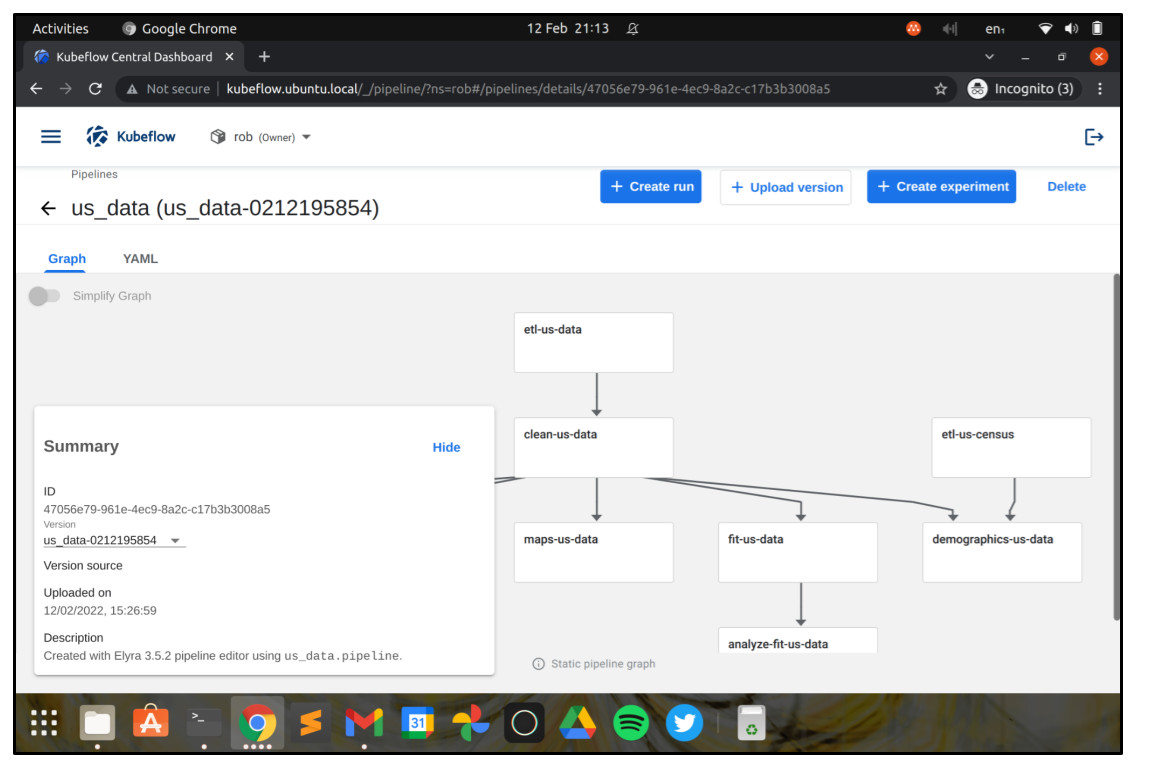
Navigate to the directory /covid-notebooks/pipelines and double-click us_data.pipeline. You should see the pipeline open in the visual workflow designer.
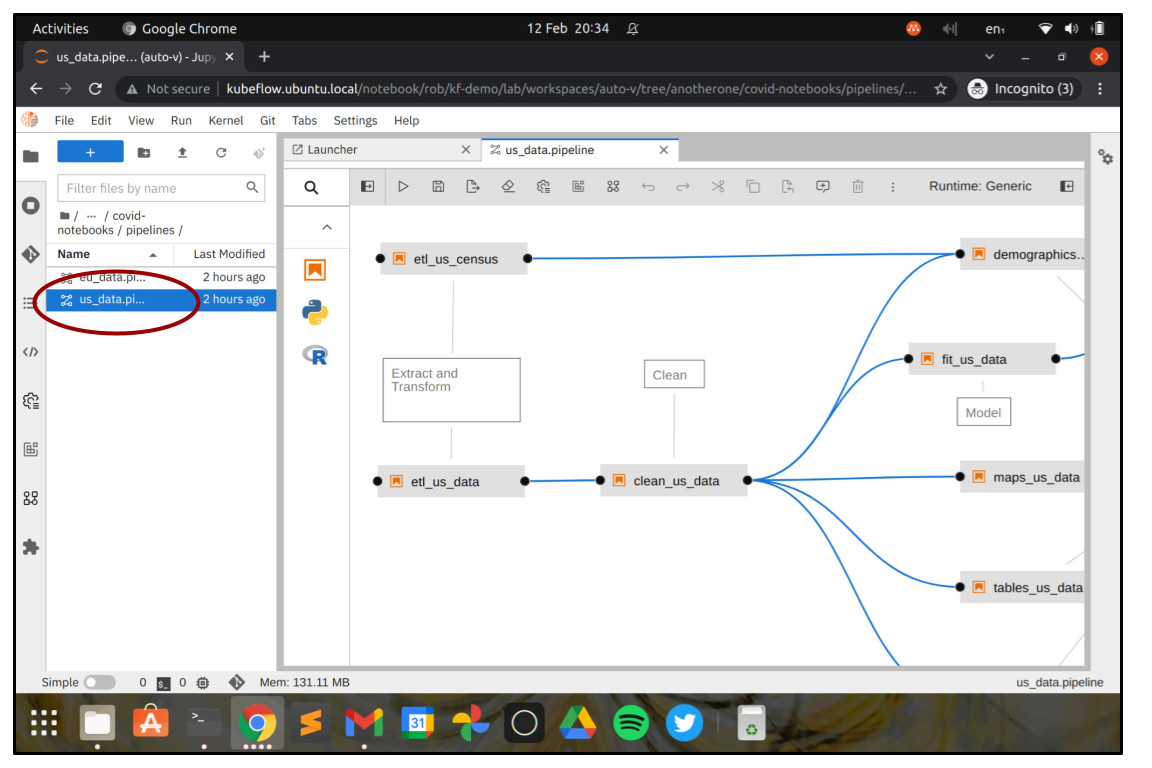
As you can see, the workflow is built out of Jupyter notebooks, linked together in steps. The output of one Jupyter notebook can be used as the input for another. When the workflow is executed, each Jupyter notebook will be run in its own Kubernetes container by Kubeflow Pipelines, which can help to ensure the execution environment is repeatable, predictable and consistent. You can choose the container image that you want to use to run each Jupyter notebook - for instance if you want to use deep learning libraries like TensorFlow, PyTorch or MXNet then you can choose to run your Notebook in a container image that already includes the prerequisite software libraries.
You can also run workflow steps using R scripts or Python programs, but mostly you’ll want to use Jupyter notebooks, because they easily allow you to provide rich documentation of what you’re doing at each step, run shell commands, and output visualisations, maps and plots, along with your code.
If you double click one of the workflow steps, the associated Jupyter notebook will open in JupyterLab, so that you can have a look. Double click on the step etl_us_census and you’ll see a few of the data wrangling steps that the example analysis performs.
Submit an Elyra pipeline job
Duration: 2:00
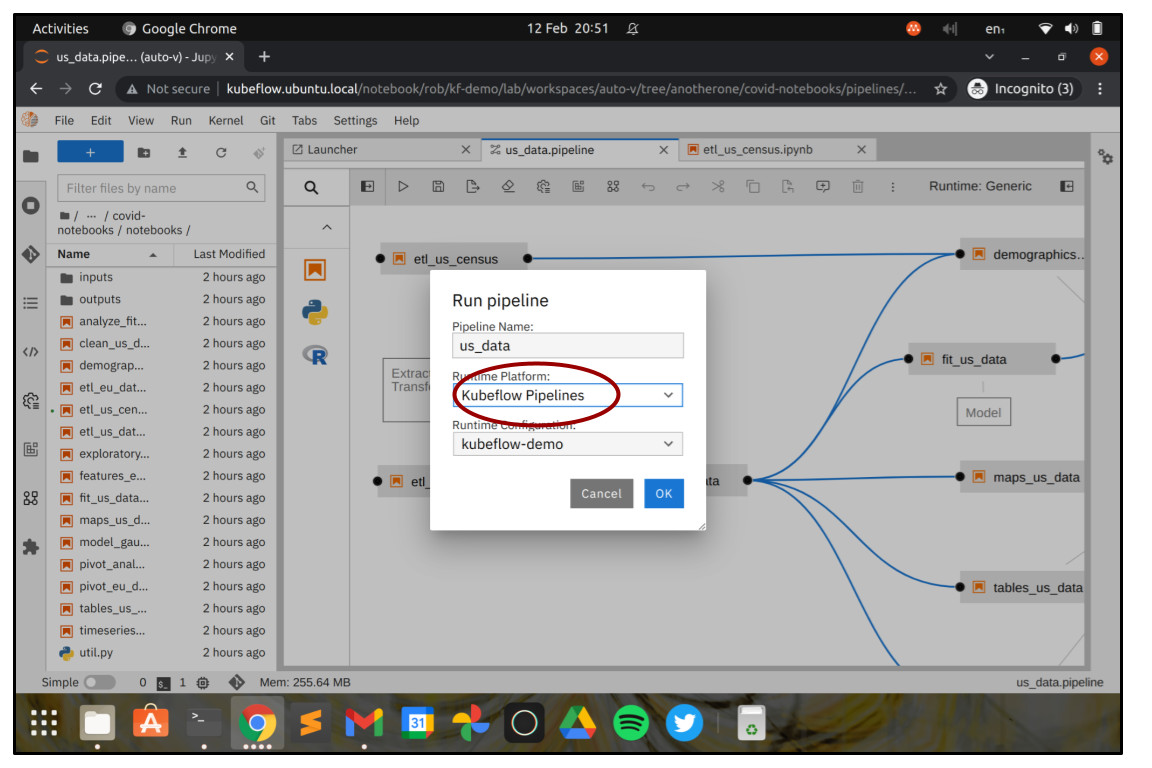
Let’s submit this as a job to Kubeflow Pipelines and see what’s next. Go back to the tab us_data.pipeline in JupyterLab and click the button with the “play” symbol. You might be prompted to upgrade the pipeline and save it first – if you are, then go ahead and do that before submitting the pipeline.
When you submit the pipeline you’ll be prompted to choose the engine to use to submit it. Make sure you choose Kubeflow Pipelines in the “Runtime Platform” dropdown before hitting Ok.
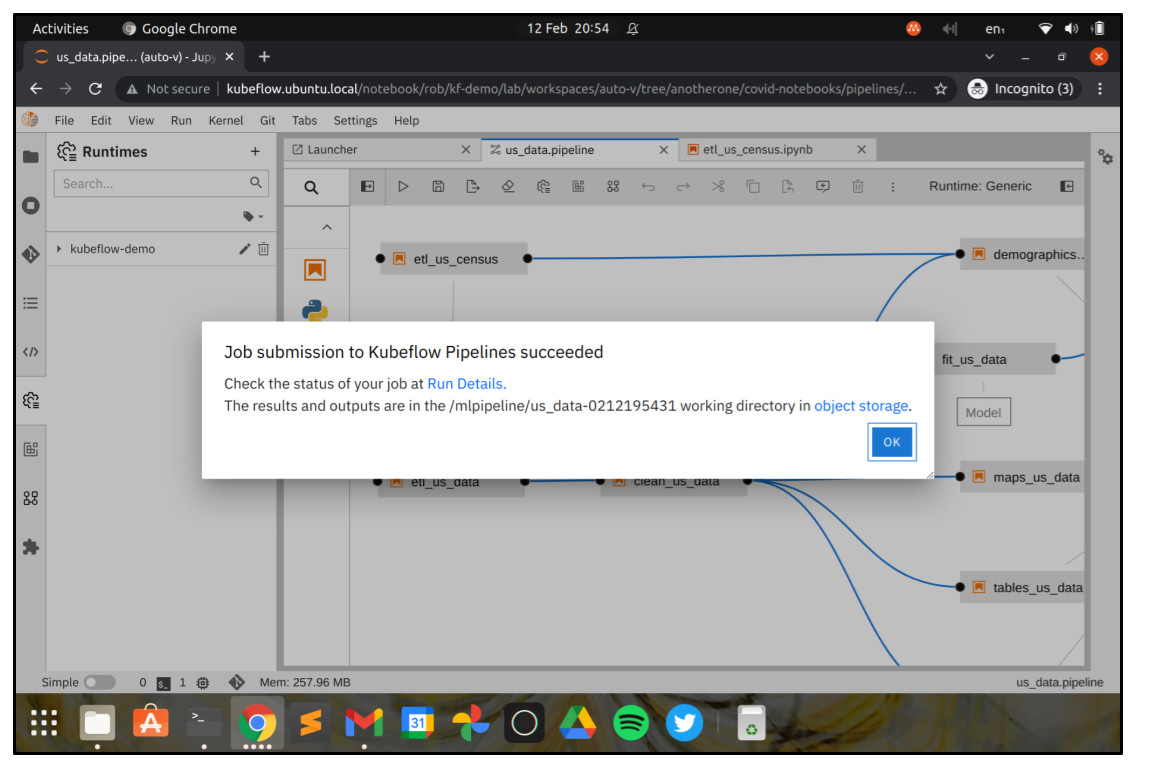
After a few moments you should see that your job has been submitted successfully.
Checking the job in Kubeflow Pipelines
Duration: 10:00
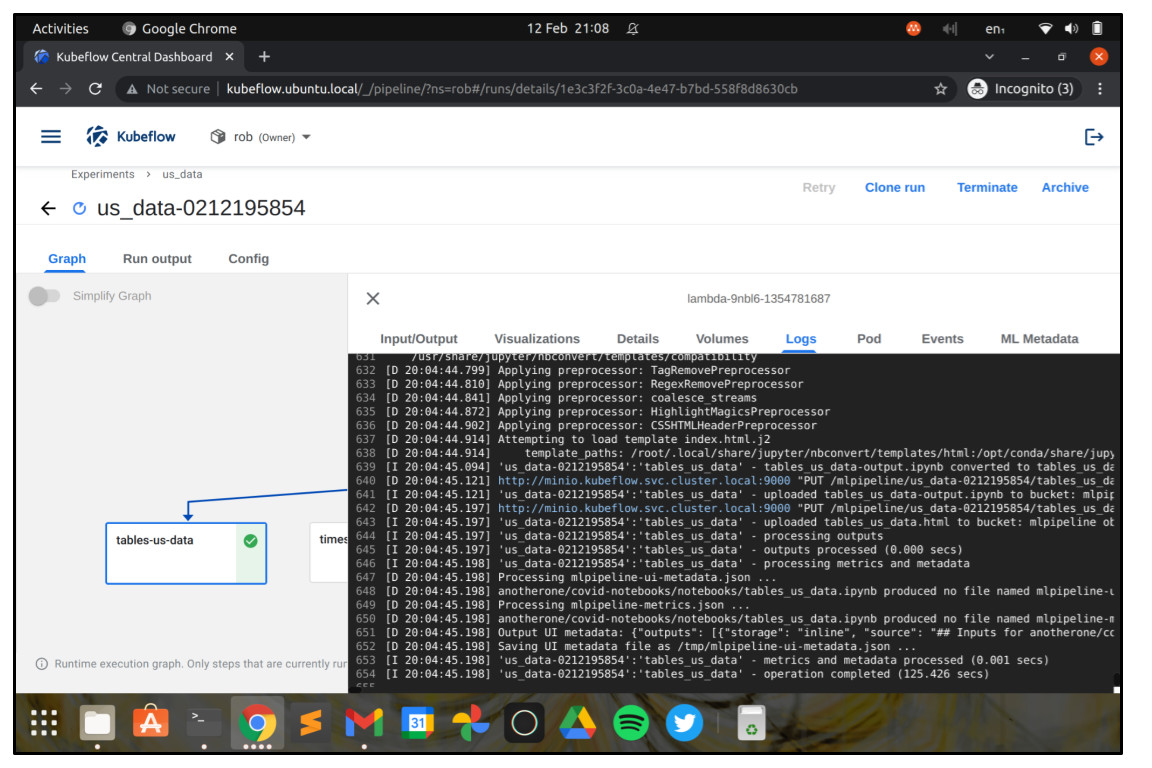
So now that the job has been submitted, we want to go back to the Kubeflow Dashboard and navigate to the “Runs” screen. In the “Runs” screen, choose the run that matches the job you just submitted, and you’ll see a visualisation of the workflow, plus its current state.
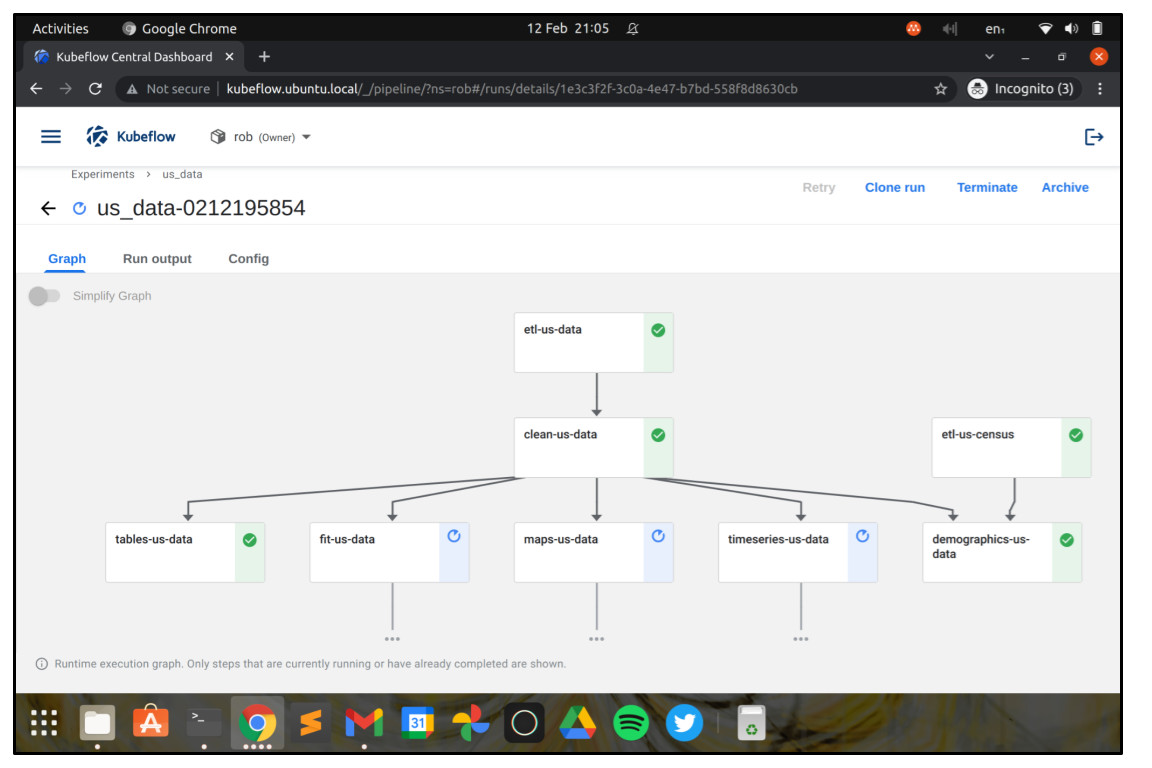
If you click on a step of the workflow, you can see detailed information about it, including log information, inputs and outputs, information about its execution environment, status, and so on.
If we now navigate to the “Pipelines” screen, we’ll see that our Job has set up a pipeline, and we can now schedule it as a recurring run if we like.
Recurring runs
Duration: 2:00
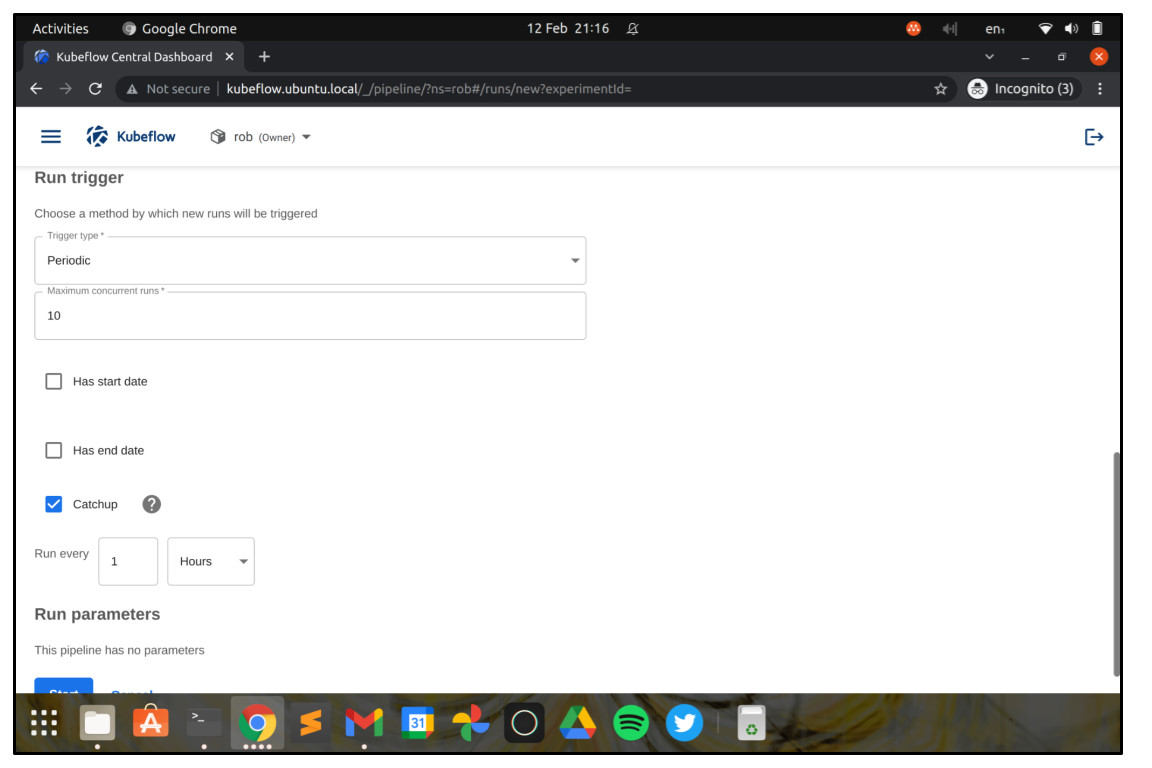
Recurring runs allow us to run a workflow on a schedule – for example once a week or once a night – which can be useful for many scenarios, from data warehouse refreshes to updating analytics and reporting dashboards, to running a champion/challenger experiment with deep learning AI models.
Reviewing some results
Duration: 5:00
The results of our COVID-19 analysis have been stored in Minio and we can have a look at them by downloading them - let’s go back to the JupyterLab tab and have a go now. In the top menu, choose “New Launcher”, and then in the launcher choose “Terminal”. You should see a new JupyterLab tab open with a terminal session. Run the following commands, being sure to set the values of YOUR_MINIO_USERNAME and YOUR_MINIO_PASSWORD correctly:
mkdir -p .aws
cat > .aws/credentials <<EOF
[default]
aws_access_key_id=$YOUR_MINIO_USERNAME
aws_secret_access_key=$YOUR_MINIO_PASSWORD
EOF
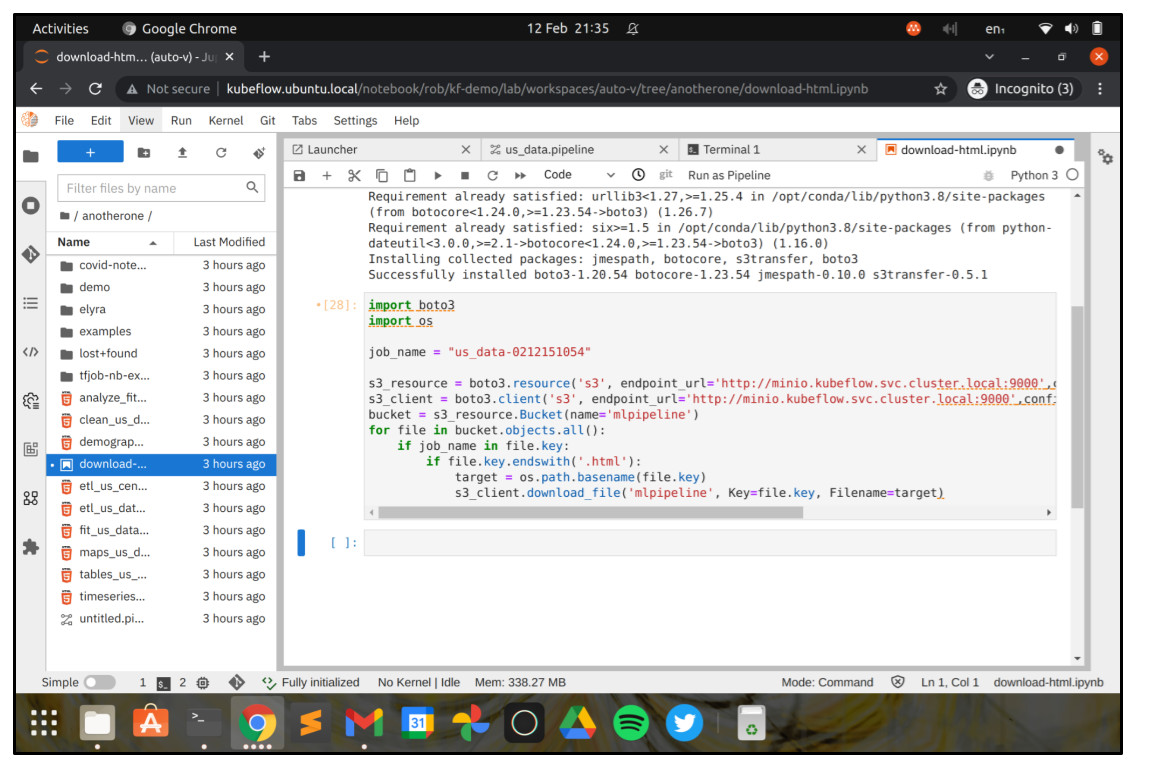
Now go back to the launcher and launch a new Python 3 Notebook. Paste the code below into the cell, being sure to change job_name to the name of your job.
!pip install boto3

import boto3
import os

job_name = "us_data-XXXX"
sig_version = "s3v4"
bucket_name = "mlpipeline"
s3_url = "http://minio.kubeflow.svc.cluster.local:9000"

s3_resource = boto3.resource('s3', endpoint_url=s3_url,
config = boto3.session.Config(signature_version=sig_version))
s3_client = boto3.client('s3', endpoint_url=s3_url,
config = boto3.session.Config(signature_version=sig_version))
bucket = s3_resource.Bucket(name=bucket_name)

for file in bucket.objects.all():
if job_name in file.key:
    if file.key.endswith('.html'):
        target = os.path.basename(file.key)
        s3_client.download_file(bucket_name, Key=file.key, Filename=target)
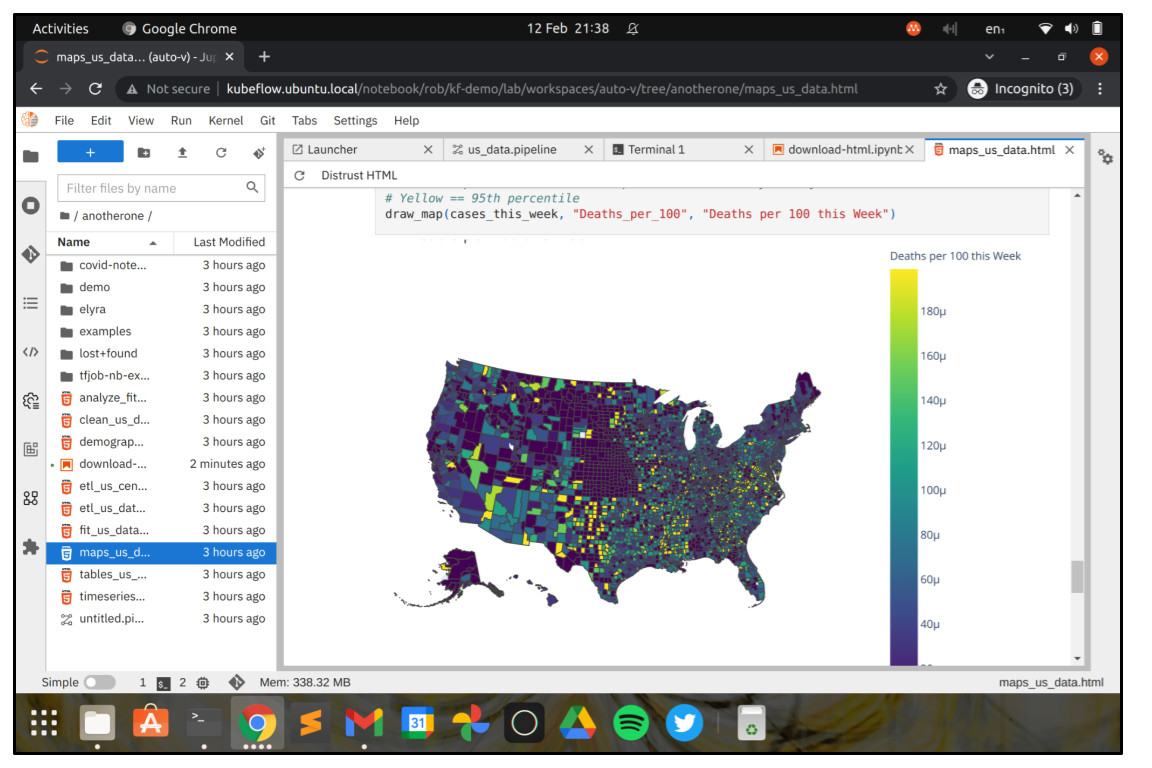
Click the “play” icon to run the script, and you should see some HTML files appear in the JupyterLab filesystem browser.
If you double-click on one of the HTML files, you can see the results of the associated analysis step. If you click “Trust HTML”, then interactive widgets will be displayed like maps and other visualisations.
Building a simple flow with Elyra
Duration: 10:00
Let’s build our own trivial workflow now just to understand how it works. We’ll build a workflow that runs a shell command that gets the current local time from the internet and writes it to a file. Then we’ll run a python script to determine if it’s morning or afternoon, and print a message accordingly.
First, use the JupyterLab launcher to create a new Python 3 Notebook. Then paste the commands below into it, and rename it, something like get_time.ipynb should be good. Don’t forget to save your changes to the notebook file.
!mkdir -p outputs
!curl -s https://time.is/ | grep -Po 'clock\"\>\K[^<]*' | head -n 1 > outputs/time.txt
Now create another new Python 3 Notebook and paste the following code into it, and rename it, something like greetings.ipynb should be good. Again, remember to save the changes to your notebook file.
!pip install pyfiglet
from dateutil import parser
from datetime import time
from os import path
from pyfiglet import Figlet

time_dir = "outputs"
time_file_name = "time.txt"
time_file = open(path.join(time_dir, time_file_name), "r")
check_time = time_file.readline()
time_file.close()

check_time_datetime = parser.parse(check_time).time()

figlet = Figlet(font='5lineoblique')

if check_time_datetime >= time(0, 0) and check_time_datetime <= time(12, 0):
    message = figlet.renderText("Good Morning!!")
else:
    message = figlet.renderText("Have a great rest of the day!!")
print(message)
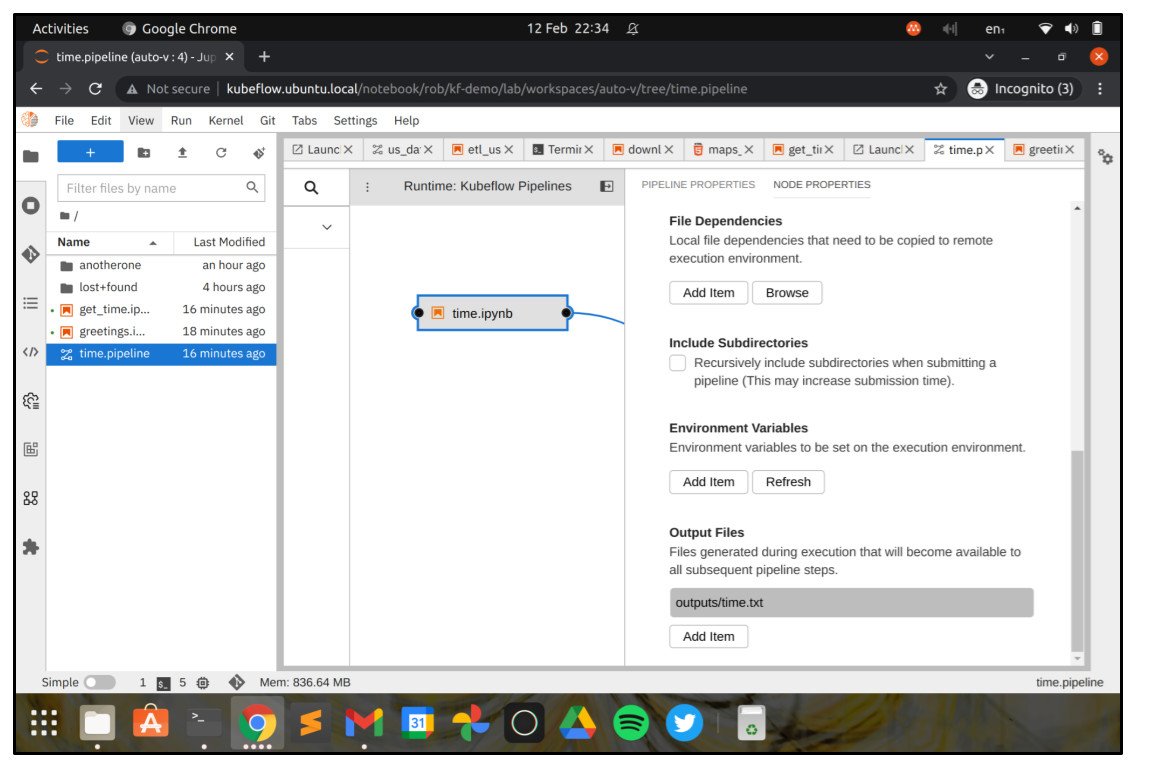
Next use the launcher to launch the Kubeflow Pipeline Editor, and drag the get_time notebook and the greetings notebook onto the canvas from the file explorer. You should be able to link them together by dragging the dot from the get_time notebook to a dot on the greetings notebook.

Now, right click the get_time notebook in the pipeline editor, and choose “open properties”. You need to choose a Runtime image for the container that the notebook will be executed in. You can configure custom images in Elyra, but for now choose Anaconda with Python 3.x from the dropdown.
Scroll down, and in the section “Output Files”, click “Add item”, and add the text outputs/time.txt. This is the output file where the shell script in the get_time notebook will write the current time, and it will be captured by Kubeflow Pipelines so that it can be used in our subsequent workflow step.
That’s pretty much it. You just need to set the Runtime container image for the greetings workflow step, and you can submit the job. Right click the greetings step, choose “open properties” and then choose Anaconda with Python 3.x like before.
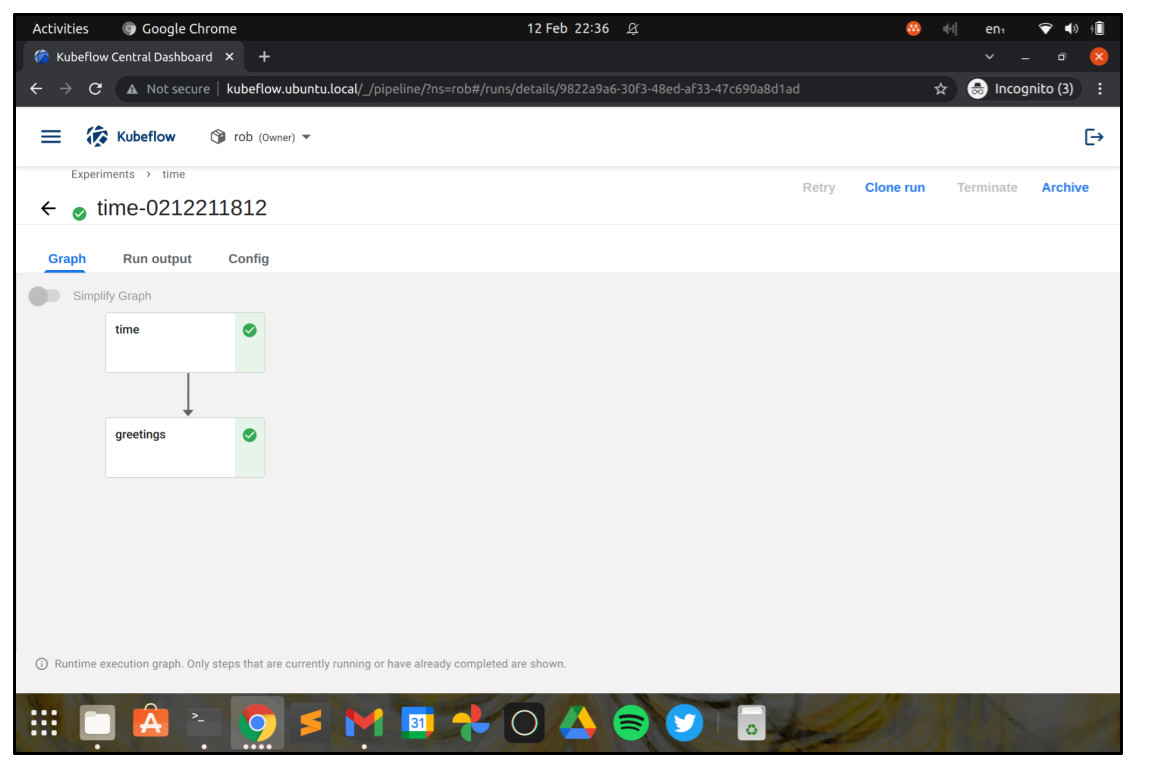
Now you can submit your pipeline! It should run fine, but if not check back and see if you made a mistake somewhere.
It’s a wrap
Duration: 1:00
Congratulations on making it through this tutorial! Hopefully now you’ll have a better understanding of a few of the features of the Charmed Kubeflow MLOps platform, and hopefully we’ve inspired you to build advanced workflows using Elyra and Kubeflow Pipelines. But if you’re having difficulties, don’t worry - head over to the forum to ask a question and get in touch with the community.
Further reading
Duration: 1:00
- How to use Charmed Kubeflow with GPUs
Have questions? Contact our sales team now.