
Get started with Managed Apache Spark on Azure
This guide describes how to get started with Canonical’s fully managed solution of Charmed Apache Spark running on top of Microsoft Azure. It provides supported operation management, deployment, and dedicated customer service.
Requirements
Before starting, ensure you have:
- Admin rights on your Azure tenant.
- The
Microsoft.ComputeandMicrosoft.Capacityresource providers registered.
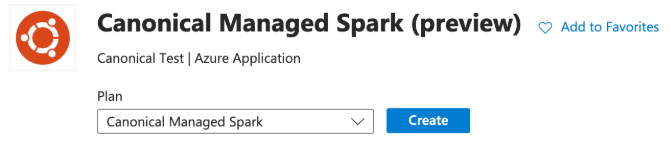
Access Azure Marketplace
Visit Azure Marketplace to find Canonical’s Managed Apache Spark offering.
You will find all the information about the application, available plans and pricing, reviews, and more.
Get started by clicking Create.
Configure initial Azure settings
Configure Apache Spark parameters:
-
Start by selecting a subscription and a resource group name (create a new one if needed). This is where Apache Spark is set up:

-
Select the region:

-
Insert your contact information:

-
Insert the name of your application and the resource group to contain the managed service. You can leave the latter field as is by default:

-
Once completed, click Next.
Configure Apache Spark cluster resources
Let’s configure your newly deployed Apache Spark instance.
In case you see a warning about `Microsoft.Capacity` and `Microsoft.Compute` resource providers, refer to the guide linked in the warning for more information.
- Choose whether you want High Availability (HA).
Enabling HA is recommended for production environments, while disabling it in development and testing environments is acceptable for saving on costs.
- Choose the VM flavour for the management instance.
The minimum deployment requires a machine size of at least 4 vCPUs and 16 GB of RAM. The use of vGPUs on a management instance is not recommended. For example, you can use 5 instances of the Standard D4s v3.

The system automatically checks if the required quota for the setup is allowed in your Azure tenant. If it’s not, the procedure generates a message containing all the information needed to increase your quota before continuing with the setup. Please, follow those instructions if needed.
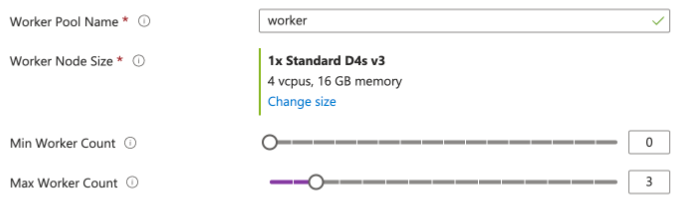
- Select the worker nodes Pool Name which is the name given to the AKS NodePool used for the workers.
- Configure the Apache Spark workers size and range.
A minimum viable worker node requires at least 4 vCPUs and 16 GB of RAM but using sizes with multiple vGPUs is recommended for the production environment:
- Once completed, click Next.
Configure storage
An Azure storage account is required for your Apache Spark environment.
-
Select whether you want to use an existing storage account or create a new one.
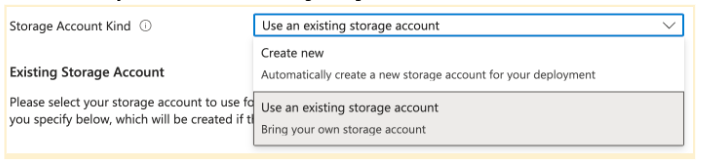
a. If you decide to create a new storage account, please select a name for it.
The name must be unique in Azure and avoid naming conflicts with other storage accounts. Additionally, the name must have between 3 and 24 characters in length and use numbers and lower-case letters only.
We recommend using the suggested name unless there is a conflict. b. If you decide to use an existing storage account, please select the one you’d like to use and its secret key and container.
-
Once the storage is configured, click Next.
Configure access
To configure access, you will have to choose the password for admin access to Kyuubi.
- Select a password for Kyuubi. The password must be at least 8 characters long and contain only numbers and letters. The username will be admin.

- Once you have set the password, click Next.
Review and submit
- Check and agree with the terms and conditions.
- Click Create to finish the configuration and start the setup.
The setup should take between 15 and 60 minutes. Once completed, you will be notified via email from canonical.com which will give you all the links and information to start using your setup. If you cannot find it, please check your Spam folder.
Get further help
You can contact Canonical Managed Services for customized deployments if you are a new user.
You can also visit the Support portal or contact out Support team if you are an existing user. You will be asked to provide your Ubuntu One account details, your subscription date, and the email address associated with the deployment.