
This guide describes how you can manage profiles in Charmed Kubeflow (CKF).
In Kubeflow, a profile denotes a collection of resources, roles, and credentials.
It must be owned by at least one user but can be shared among multiple ones.
A user can also have multiple profiles.
The multi-tenancy component provides profile management.
For each profile, Kubeflow creates a namespace of the same name that encapsulates the resources specific to that profile. See Kubeflow profiles and namespaces for more details.
Charmed Kubeflow (CKF) facilitates profile management by automating the process of profile creation and initialisation.
Create a profile
- If you’re using
juju < v.3.0:
In a terminal, run the code below to enable the Juju actions feature flag:
export JUJU_FEATURES=actions-v2
-
Get the username of the user used to log in to the dashboard. For example, if you’ve chosen to authenticate with the default identity provider Dex, this would be your Dex username.
-
Think of a name for the profile you are creating.
If you want to limit the resources that will be available to this profile, also:
Define a resource quota by defining a variable (below, RQ) with the resource quota keys set to the desired values (feel free to adjust), as below:
RQ=$(cat <<END
{
  "hard": {
    "cpu": "2",
    "memory": "2Gi",
    "requests.nvidia.com/gpu": "1",
    "persistentvolumeclaims": "1",
    "requests.storage": "5Gi"
  }
}
END
)
- Create a user profile by running the
create-profileaction with theusernameandprofilenamekeys, passing as values the username and profile name from the previous steps:
juju run kubeflow-profiles/0 create-profile username=<the authenticated username> profilename=<the new profile name>
If you want to limit the resources available to this profile:
Also use the resourcequota key, passing as a value the contents of the resource quota variable you defined earlier (in our case, RQ):
juju run kubeflow-profiles/0 create-profile username="<the authenticated username>" profilename="<the new profile name>" resourcequota="$RQ" --string-args
See more: Juju OLM |
juju run, Charmed Kubeflow Profiles > Actions >create-profile
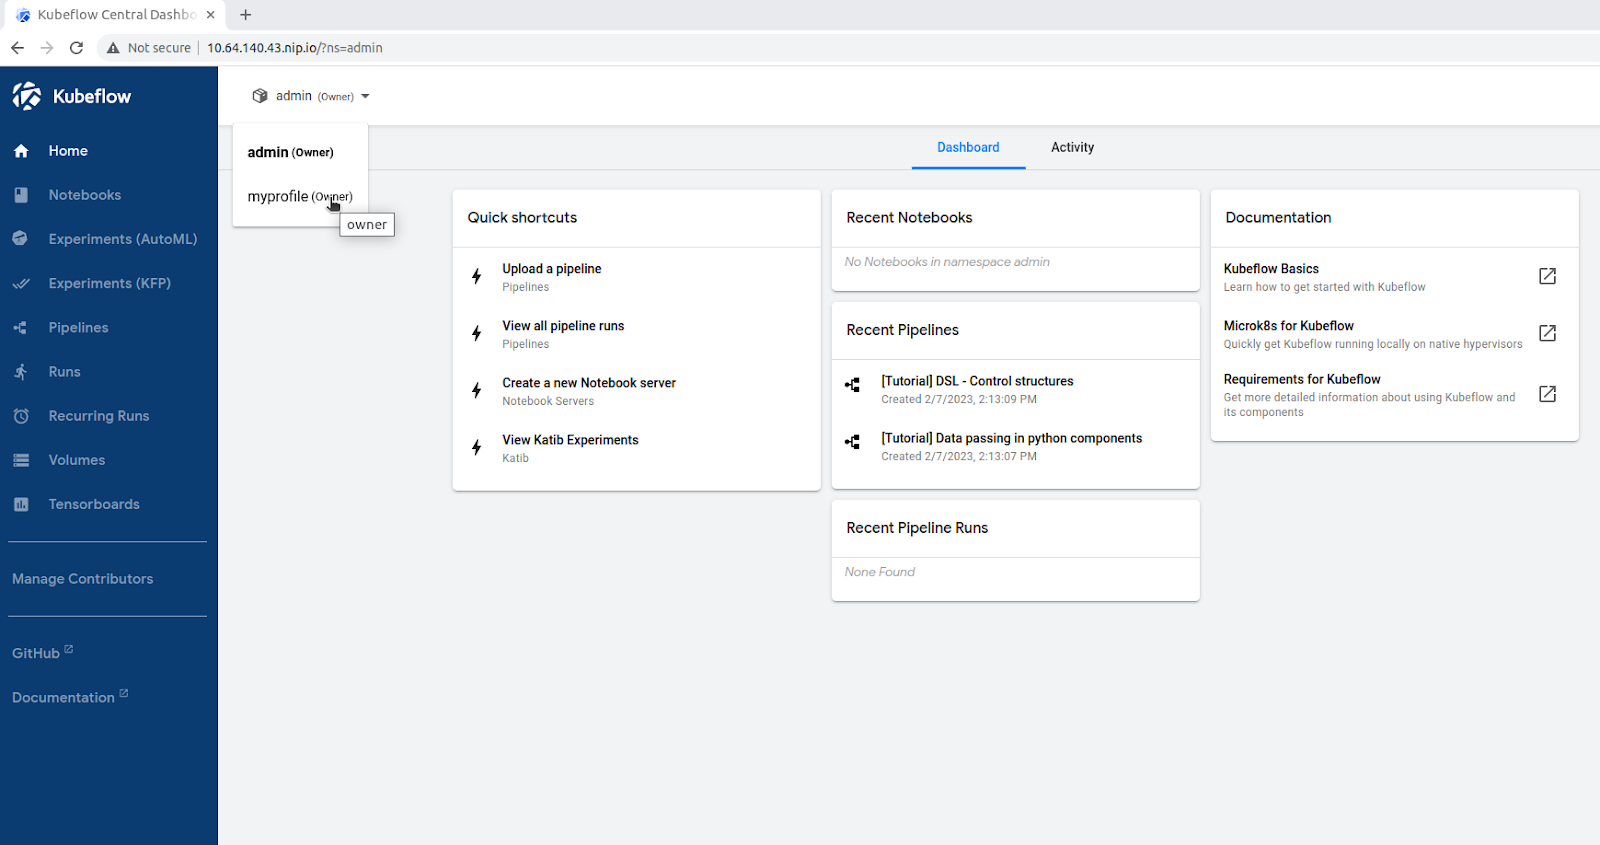
- Verify that the profile works by accessing the dashboard. (You’ll need the username you used above.) Once you are in, you should see the newly created user profile on the dashboard. The screenshot below shows this for a new profile with the name
myprofile.
Initialise a profile
If you’ve created your profile using the Charmed Kubeflow Profiles create-profile action:
You do not need to do this step, as your profile has already been initialised.
To initialise a profile, open up a terminal and run the initialise-profile action with the profilename key set to the name of the existing profile that you wish to initialise.
juju run kubeflow-profiles/0 initialise-profile profilename=<profile name>
This will apply a set of credentials to the profile’s namespace that will enable you to use Minio, MLFlow, and Seldon, if you wish.
See more: Juju OLM |
juju run, Charmed Kubeflow Profiles > Actions >initialise-profile
Expand to see the effect of initialising your profile on Notebooks
Once you’ve initialised your profile, if you go ahead to create a Jupyter Notebook, you should see two options, to allow access to Minio and MLFlow, as shown in the screenshot below.

Delete a profile
To delete an existing profile, follow the upstream documentation.
In case that was the only profile owned by your user, next time you log in, you will be prompted to create a namespace for your user.