
See also: MLOps pipeline
Build an MLOps pipeline using Kubeflow Pipelines (KFP), Seldon Core and MLFlow. The example pipeline aims to predict wine quality based on chemical analysis.
Contents:
- Set up your environment
- Load the data
- Preprocess our ML source data
- Train our ML predictive model
- Deploy our ML model
- Put the MLOps pipeline together
- Check the Inference endpoint
Set up your environment
Grab the code samples and let’s execute them together in order to get the most out of this document. You’ll need a working Kubeflow deployment with MLFLow up and running. For detailed installation instructions, take a look here and here.
During the journey through the pipeline, each step will show us something new. Let’s go!
Load the data
The first step is one of the most frequently performed actions. We want to download the source data and put it in object storage. We can copy some of our old code from the past, but do we have to? Let’s check if we can find this component in the Kubeflow Pipelines components directory.
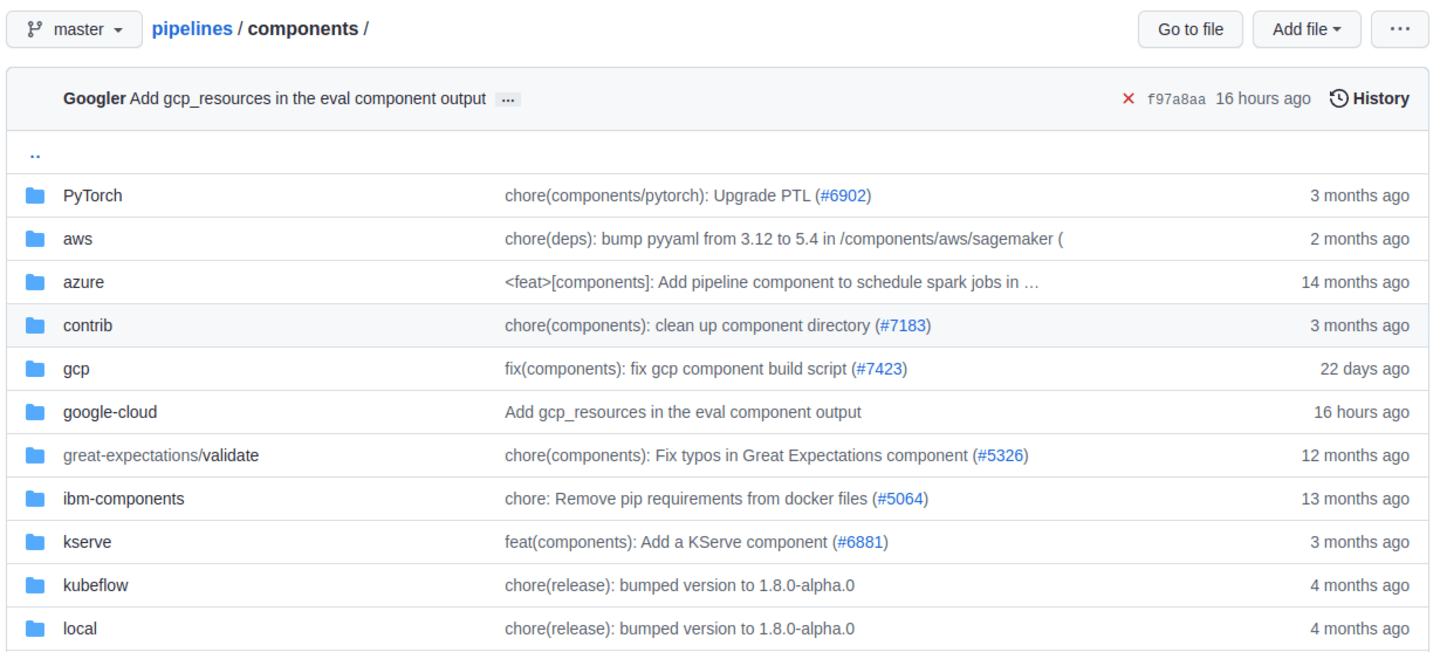
Whenever you need to add a step to the pipeline, first check if it doesn’t already exist in the Kubeflow Pipeline components registry. This way adding a new step to the pipeline is simple – you can either load it from the URL or download and load it from a local file.
web_downloader_op = kfp.components.load_component_from_url('https://raw.githubusercontent.com/kubeflow/pipelines/master/components/contrib/web/Download/component.yaml')
Just like that, we developed our first step!
Preprocess our ML source data
For the preprocessing step we need a different approach. Each data preprocessing step is different, so we likely won’t find what we need in the KFP components registry. During the experiment phase, preprocessing is usually done in a jupyter notebook. So we will wrap this code into a Python function so that we can convert it into a component. It’s important to notice that pandas import is inside the Python function because the library needs to be imported inside the Docker container that will eventually be running the step.
from kfp.components import InputPath, OutputPath

def preprocess(file_path: InputPath('CSV'), output_file: OutputPath('parquet')):
  import pandas as pd
  df = pd.read_csv(file_path, header=0, sep=";")
  df.columns = [c.lower().replace(' ', '_') for c in df.columns]
  df.to_parquet(output_file)
We have a function. We can write tests for it if we want, to be sure it works correctly. Now we’ll wrap it into the container so the Kubernetes platform underneath Kubeflow will know how to invoke our code. We’ll use the Docker image for Python 3.9 and install additional python packages using Python’s pip package manager.
preprocess_op = kfp.components.create_component_from_func(
  func=preprocess,
  base_image='python:3.9',
  packages_to_install=['pandas', 'pyarrow'])
This method allows us to quickly build a pipeline in a way that does not require additional resources like template files. It also works nicely as a way for you to build the pipeline using a notebook. However installing Python packages each time the step is executed is not ideal, especially if the pipeline is invoked frequently.
Train our ML predictive model
This preprocessing step is created using a function-based component too. The difference in this step is that we need to make calls to MLFlow and Minio – and these calls require setting some environment variables. How to securely handle setting up the environment variables is something we will discuss later in this document. Additionally, we’ll change the training code, so that all of the information about the experiment will be saved in MLFLow and the ML model artefact that this step generates will be stored in Minio.
from kfp.components import InputPath

def train(file_path: InputPath('parquet')) -> str:
  import pandas as pd
  from sklearn.model_selection import train_test_split
  import mlflow
  from sklearn.linear_model import ElasticNet

  df = pd.read_parquet(file_path)
  target_column = 'quality'
  train_x, test_x, train_y, test_y = train_test_split(
    df.drop(columns=[target_column]),
    df[target_column])

  with mlflow.start_run(run_name='wine_models'):
    lr = ElasticNet(alpha=0.5, l1_ratio=0.5, random_state=42)
    lr.fit(train_x, train_y)
    result = mlflow.sklearn.log_model(lr, "model")
    return f"{mlflow.get_artifact_uri()}/{result.artifact_path}"
The value returned from the step is the model URI – the path to the model file in Minio. But if you need to return more than a single value, you can use a NamedTuple. For more details take a look here.
training_op = kfp.components.create_component_from_func(
  func=train,
  base_image='python:3.9',
  packages_to_install=['pandas', 'pyarrow', 'sklearn', 'mlflow', 'boto3'])
The training container was created based on the same Python 3.9 image as the previous step. When creating steps from functions, it’s best to try and use the same image whenever possible, in order to take full advantage of the Kubernetes caching mechanism for Docker images.
Deploy our ML model
We’ll create the inference server deployment that’ll host our ML model using a Docker container-based, microservices approach. The code for this step is not in the experiment notebook. We’re going to use Seldon Core for deployment together with MLFLow Server so that we can take full advantage of features like monitoring our deployment without needing to build a dedicated Docker image. The model artefact will be downloaded by the Seldon Core deployment from our Minio object storage system. In this step, we’ll need to use kubectl to apply our SeldonDeployment configuration. The URI containing the path to the ML model is externally provided to the training step.
Developing the deployment step is split into a few parts:
- create the command-line application
- wrap it in the Docker image and publish it
- create the component configuration
- create the step from the component configuration file
Create the command-line application
First, we create a command-line application, which calls “kubectl” with a file generated from a Jinja template as a parameter.
import argparse
import subprocess
from jinja2 import Environment, FileSystemLoader

def deploy(model_uri: str):
  with open("/tmp/manifest.yaml", "w") as f:
    env = Environment(loader=FileSystemLoader('./templates'),
    trim_blocks=True, lstrip_blocks=True)
    template = env.get_template('deploy-manifest.j2')
    f.write(template.render(model_uri=model_uri))
  result = subprocess.call(['kubectl', 'apply', '-f', '/tmp/manifest.yaml', '-n', 'admin'])
  assert result == 0

if __name__ == '__main__':
  parser = argparse.ArgumentParser(description='Data processor')
  parser.add_argument('--model_uri', help='Model URI')
  args = parser.parse_args()
  deploy(args.model_uri)
Build and push the Docker image
Next, we use Docker to build and push an image to the Docker image registry. The Dockerfile can be found here and the build script is below.
#building script
VERSION=<version>
REPO=<repository>
docker build . -t $REPO:$VERSION
docker push $REPO:$VERSION
docker inspect --format="{{index .RepoDigests 0}}" "$REPO:$VERSION"
Create a component configuration file
Thirdly, we will create a Kubeflow pipeline step configuration file using the output from docker inspect. This configuration file is crucial in order to be able to share your Kubeflow pipeline step with other teams.
name: Deploy model
description: deploy model using seldon core
inputs:
  - { name: model_uri, type: String, description: 'model URI' }
  implementation:
    container:
      image: <image-name>
      command: [
        python3,
        src/deploy.py,
        --model_uri,
        { inputValue: model_uri }
      ]
Load our component
Finally, we’ll load the components in a similar way to the “Download data” step. We use the configuration file we created in the third step to specify which Docker image is used, how it is to be invoked and what the input and output parameters are.
deploy_op = kfp.components.load_component_from_file(
  os.path.join('components', 'deploy', 'component.yaml'))
The biggest advantage of this component creation method is extensibility. If we want to, we can use any language to create the command-line application implementation. We can use Python and Jinja (a free templating engine) in order to keep the code clean. We can have our manifest code in the template file, which was not possible with a function-based approach. Additionally, we do not need to install Python libraries every time we execute the step. That means faster execution times!
If you don’t want to build your own Docker image, feel free to use the one we’ve set up in the repository.
Put the MLOps pipeline together
We’ve defined all the components – now let’s create a pipeline from them. We need to put them in the proper order, define inputs and outputs and add appropriate configuration values.
@dsl.pipeline(
name="e2e_wine_pipeline",
description="WINE pipeline")
def wine_pipeline(url):
  web_downloader_task = web_downloader_op(url=url)
  preprocess_task = preprocess_op(file=web_downloader_task.outputs['data'])
  train_task = (training_op(file=preprocess_task.outputs['output'])
      .add_env_variable(V1EnvVar(name='MLFLOW_TRACKING_URI', value='http://mlflow-server.kubeflow.svc.cluster.local:5000'))
      .add_env_variable(V1EnvVar(name='MLFLOW_S3_ENDPOINT_URL', value='http://minio.kubeflow.svc.cluster.local:9000'))
      # https://kubeflow-pipelines.readthedocs.io/en/stable/source/kfp.extensions.html#kfp.onprem.use_k8s_secret
      .apply(use_k8s_secret(secret_name='mlpipeline-minio-artifact',
        k8s_secret_key_to_env={
            'accesskey': 'AWS_ACCESS_KEY_ID',
            'secretkey': 'AWS_SECRET_ACCESS_KEY',
  })))
  deploy_task = deploy_op(model_uri=train_task.output)
We don’t need to specify the order of the tasks explicitly. When you set input-output dependencies, the tasks will order themselves. Convenient, right?!
When looking at the training task, we see it differs from the others. It requires additional configuration. We need to add some sensitive data using Kubernetes secrets and the rest using environment properties. Kubeflow Pipelines supports multiple ways to add secrets to the pipeline tasks and more information can be found here.
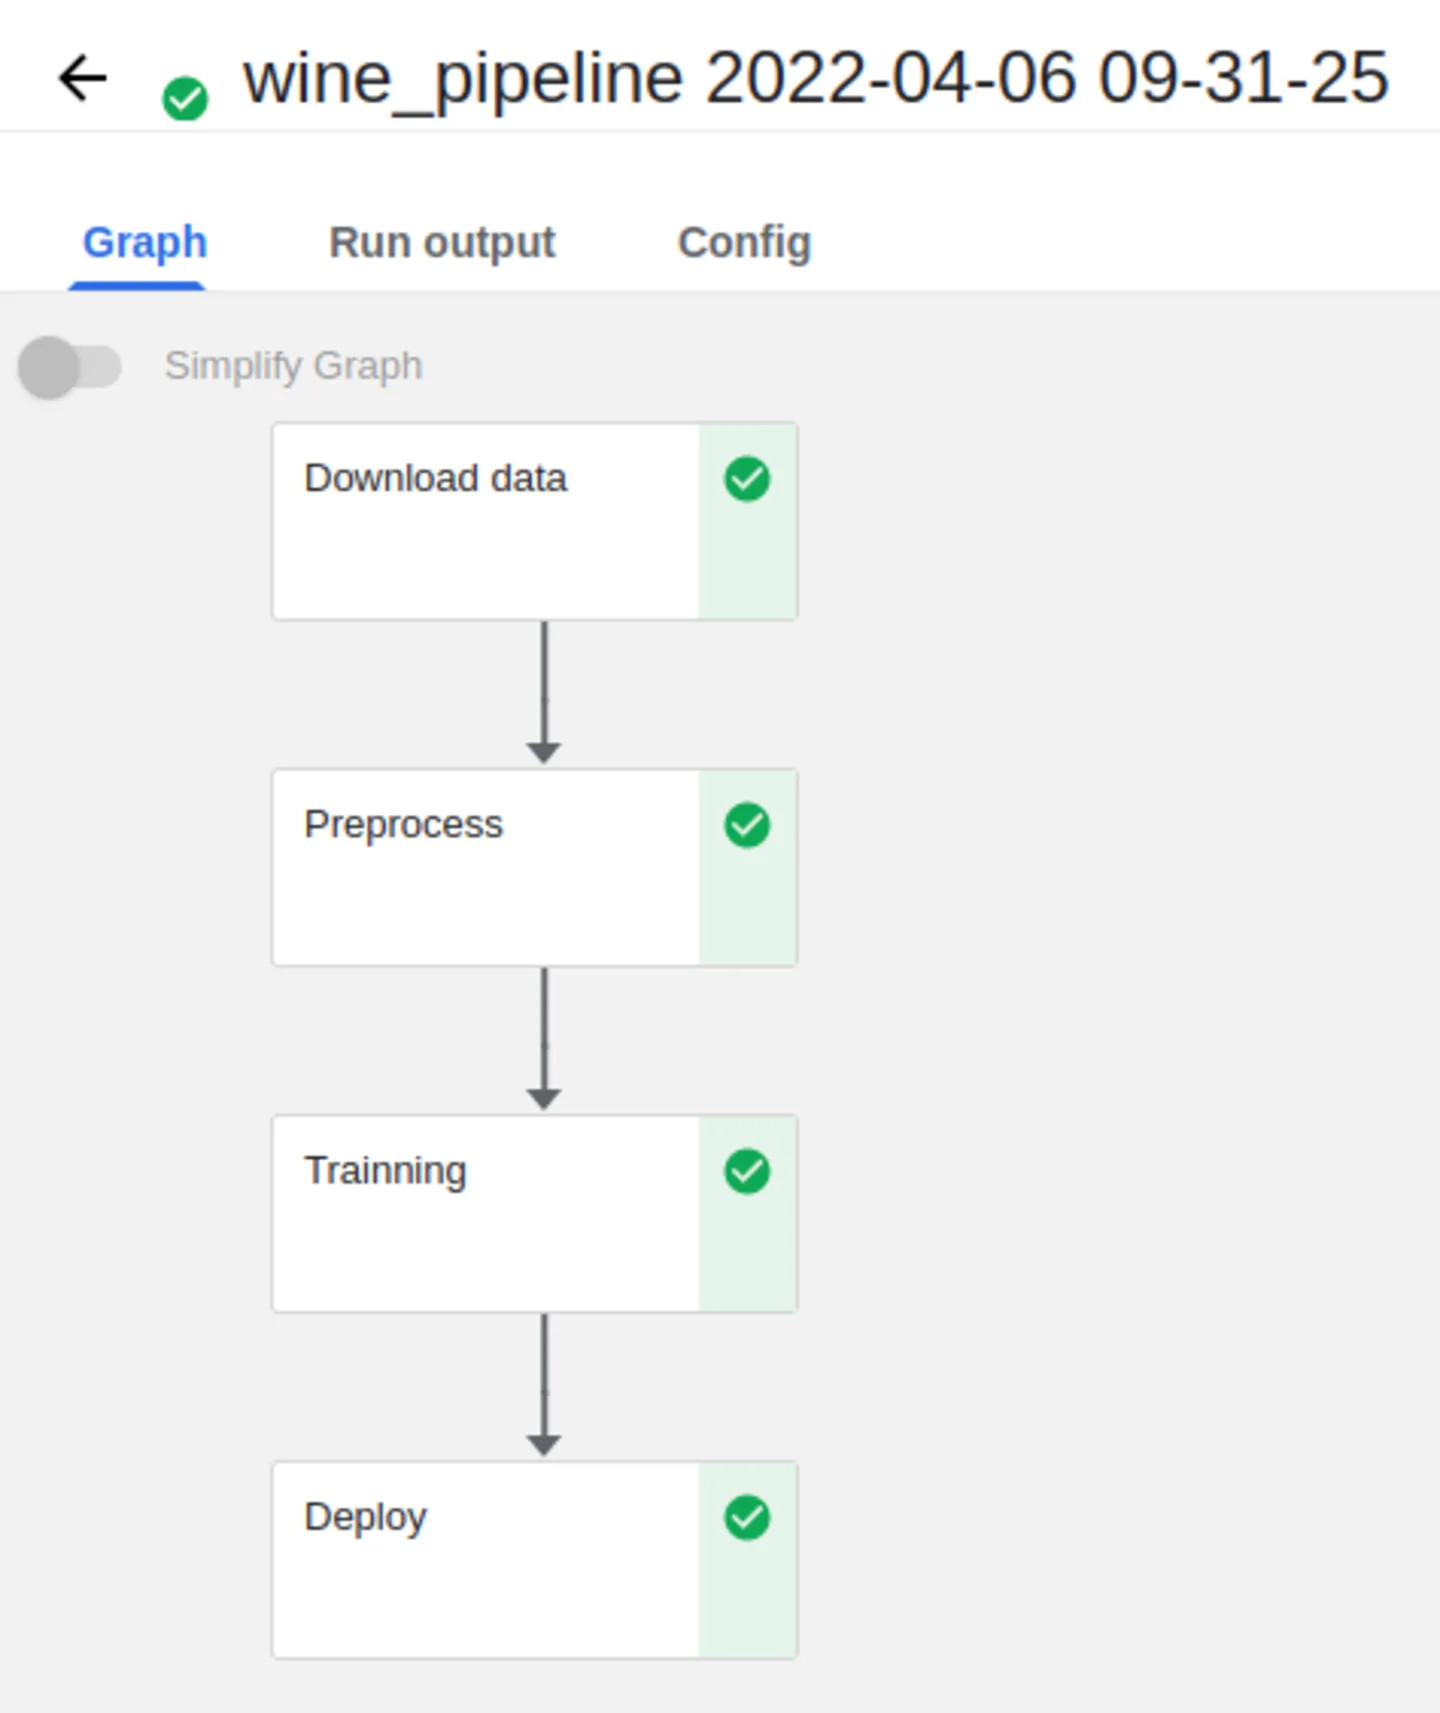
Now, the coding part is completed. All that’s left is to see the results of our pipeline. Run the pipeline.py to generate wine-pipeline.yaml in the generated folder. We’ll then navigate to the Kubeflow Dashboard with our browser, create a new pipeline with our YAML file and – the moment of truth – run the pipeline.
Check the Inference endpoint
We want to be 100% sure it works – so let’s check if the inference endpoint is responding correctly. First, go to the Kubernetes cluster and port-forward or expose the newly created service. Then, let’s use curl to see if the endpoint is responding correctly.
curl -s http://localhost:8000/api/v0.1/predictions \
-H "Content-Type: application/json" \
-d '{"data":{"ndarray":[[5.6, 0.31, 0.37, 1.4, 0.074, 12.0, 96.0, 0.9954, 3.32, 0.58, 9.2]]}}'
{"data":{"names":[],"ndarray":[5.247960704489777]},"meta":{"requestPath":{"classifier":"seldonio/mlflowserver:1.14.0-dev"}}}
Seldon Core supports batch inference out-of-the-box and its performance is much better than calling the endpoint in a loop.
Our MLOps tour: summary
In this article, we developed an MLOps pipeline. The pipeline downloads data, preprocesses it, trains a model on the data and then deploys a microservice that hosts it. We saw three different ways of creating Kubeflow Pipeline components:
- Reuse of existing components from public or private component repositories
- Function-based components – great for fast iteration with all the code in a single function
- Docker image based components – the most time-consuming approach; but also the most flexible one.
We also set up secrets and configuration variables for the task. Sensitive information wasn’t exposed in the open during task execution.
Is the pipeline finished? Well…it has many places where it could be improved like:
- Checking the status of the SeldonDeployment before finishing the task
- Changing the model status in the MLFlow model registry
- Doing a canary deployment and automatically running A/B tests
- The deployment step could be made more reusable
Up for the challenge? Give it a try!
Suggested reading
- Using AKS spot instance with Kubeflow Pipelines
- Kubeflow Pipelines Best Practises
- GPU acceleration with Charmed Kubeflow
All code is available in this repository.
Have questions? Contact our sales team now.