
See also: Juju Dashboard, Charmhub |
juju-dashboard
This document demonstrates how to use Juju Dashboard.
Starting with juju v.3.0, Juju Dashboard needs to be set up via the juju-dashboard charm. (Previously it came automatically with every controller.)
See more: Charmhub |
juju-dashboard
Set up the dashboard
First, switch to the controller model (always called controller; see juju status):
juju switch controller
Then, deploy the charm. For machine charms deploy juju-dashboard:
juju deploy juju-dashboard
For Kubernetes deploy juju-dashboard-k8s:
juju deploy juju-dashboard-k8s
Next, integrate it with the controller application (always called controller; see juju status):
juju integrate juju-dashboard controller
Now, expose the juju-dashboard application:
juju expose juju-dashboard
Your application is now ready to be accessed.
Access the dashboard
Access using the CLI
First, use the dashboard command to get the IP address and login credentials to access the dashboard. This command will need to be run on the same machine as your browser as it will proxy a secure connection to the controller.
juju dashboard
This will produce output similar to the following:
Dashboard for controller "my-controller" is enabled at:

https://10.55.60.10:17070/dashboard

Your login credential is:

username: admin

password: 1d191f0ef257a3fc3af6be0814f6f1b0
See more:
juju dashboard
Now copy-paste the URL into the browser to access the dashboard.
If you don’t want to copy and paste the URL manually, typing juju dashboard --browser will open the link in your default browser automatically.
Your browser will give you an error message when you open the URL warning that the site certificate should not be trusted. This is because Juju is generating a self-signed SSL certificate rather than one from a certificate authority (CA). Depending on your browser, choose to manually proceed or add an exception to continue past the browser’s error page.
After opening the Juju dashboard URL, you are greeted with the login window, where you will have to provide the credentials to access the model. These credentials can be copied from the output of juju dashboard.
If you’d rather not have your login credentials displayed in the output of juju dashboard, they can be suppressed by adding the --hide-credential argument.
Access without the CLI
If you would like Juju Dashboard to be available without using the CLI to proxy your connection, you will need to set up a web proxy (e.g. HAProxy) in front on the dashboard and Juju controller API.
Upgrade the dashboard
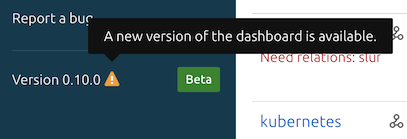
The dashboard might inform you that a newer version is available.
If you have permission to modify the controller model you can upgrade the dashboard application charm.
First, switch to the controller model:
juju switch controller
Get the name of the Juju Dashboard application from juju status and look for the application with the juju-dashboard or juju-dashboard-k8s charm:
juju status
To upgrade the dashboard to the latest version in the current channel run:
juju refresh [dashboard-app-name]
If you want to see what other channels are available run the following if you’re using machine charms:
juju info juju-dashboard
For Kubernetes deployments run:
juju info juju-dashboard-k8s
You can change channels by specifying the new channel e.g.:
juju refresh [dashboard-app-name] --channel=latest/beta
See more:
juju refresh